


A great deal of the frustration and disappointment which people experience with woodcraft tools is caused by lack of guidance and instruction in the choice of those tools in the first place. Perhaps the greatest deterrent to success, however, is the failure to appreciate that, no matter how perfect the tool is, if it has a cutting edge, then it must be sharpened. Most tools are accurately ground at the factory, but few are ready-sharpened and all will need to be sharpened from time to time anyway.
No one seems to like sharpening tools, yet the satisfaction of using a really sharp tool is appreciated by everyone. Cutting should be effortless, and a correctly and perfectly sharpened tool is also much safer (which is why experienced woodworkers commonly say "a sharp blade is a safe blade"). The equipment for grinding and sharpening can be very simple or quite sophisticated, depending on the space and money available. It is unlikely that you will be able to have your tools reground and sharpened by a professional, so you must ensure you have the right equipment to do it yourself. Top quality steel is essential for a true, long lasting edge. An edge of lesser quality material will literally crumble over time in use.
Whether you are sharpening up a chisel, a plane, or just information on sharpening stones, look no further. This article contains links to how to sharpen a specific woodworking tool below as well as provide a brief overview of each. If you are looking for a product guide for a specific tool we carry, please check out the Tool Guides page.
An important piece of home tool sharpening is the use of sharpening stones. There are two groups of sharpening stones: man-made and natural; and you may encounter oil stones, water stones, and diamond stones. Each has their purpose and we detail them in our blog article about Sharpening Stones.
To see our selection of sharpening stones and tools, check out our Sharpening and Grinding category.
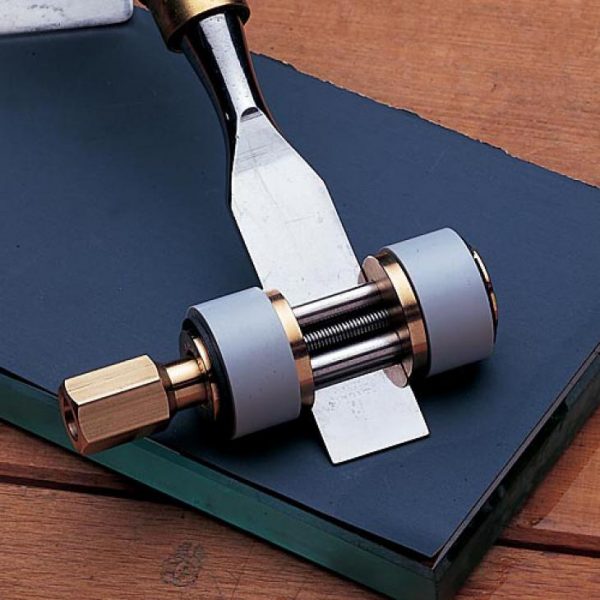
Chisel
Chisels are one of the most widely-used and generally abused tools currently made. Many woodworkers use one chisel for every job and this can dull the edge quicker than expected.
sharpening chisels
- Rest the ground face flat on an oilstone which has been lubricated with light machine oil to keep the tool cool and float away metal particles.
- Raise the chisel to form an angle of 30 degrees with the stone. Move the chisel backwards and forwards in a figure 8 movement along the full length of the stone, until a burr (raised edge to dispose of) forms on the flat side of the chisel and extends along the full width of the cutting edge.
- Place the chisel flat on the oilstone, ground face up, and lightly stroke it up and down to remove the burr.
For mortise chisels, the honing angle should be 35 to 40 degrees, depending upon the wood. Hardwoods such as oak put tremendous stress on an edge. If the bevel angle is too shallow, the edge will chip. In softwoods, too blunt a bevel angle can cause excessive fibre crushing and tear-out along the edge of the mortise. A razor-sharp edge allows you to increase the bevel angle and make the tool usable in a range of woods.
Japanese chisels, because they have a very hard layer of steel bonded to a layer of iron, need steeper bevel angles. A Japanese mortise chisel, for example, normally comes with a factory grind of 45 degrees. This should never be reduced, as the steel is simply too brittle to support a shallow bevel (the hard steel, though brittle, takes a better edge, and holds it longer).
Check out our selection of chisels and find the right one for your next project.
hand planes
Similar to chisels, hand planes are designed for a variety of tasks and they come in all shapes and sizes. However, sharpening the cutters themselves have a fairly straightforward process. Many craftsmen prefer to sharpen on the 25 degree ground bevel, but usually a 30 degree angle is formed when sharpening.
Sharpening Hand Planes
- Rest the ground bevel flat on the oilstone and raise the cutter to form a honing angle of 30 degrees.
- Move the cutter backwards and forwards along the full length of the stone until a burr is formed on the flat side.
- Place the cutter flat on the oilstone with the bevel uppermost. A few light strokes along the stone will remove the burr.
- The cutter is now ready for use.
If sharpening a smoothing plane cutter, slightly round each edge. If sharpening a jack plane cutter, make sure the cutting edge has a slightly convex shape.
Check out our selection of hand planes and find the right one for your next project.
gouges
Gouges have a blade anatomy that is unique in that it has a rounded edge, and the direction bevel determines whether the gouge is an in-cannel gouge or an out-cannel gouge. In-cannel refers to the gouges with the bevel edge facing the inside, or concave side, of the cutting blade, while the out-cannel refers to gouges with the bevel edge facing the outside, on the convex side, of the blade. Large gouges are best sharpened using a gouge-specific slipstone. They are tapered stones and have a convex and concave side, meant to serve both types of gouges.
Sharpening Out-cannel gouges
Best sharpened with a sharpening stone, removal of the burr done with a slipstone.
- Place the ground bevel on the stone and rub it backwards and forwards along the length of the stone, whilst slowly rotating it from edge to edge at the same time to produce a burr along the entire cutting edge.
- Remove this burr with a slipstone, keeping it flat against the inside of the gouge.
- Always keep the edge square at the ends, so that when pressed onto a piece of wood, the gouge leaves a clear imprint on its surface.
- Finish the bevel finally by rotating the gouge at a 90 degree angle along the stone.
- The gouge is now ready for use.
Sharpening In-cannel gouges
- Choose a round-edged slipstone of the same radius as the gouge.
- Carefully fix the lightly oiled stone in a woodworking vice or slotted block.
- Rest the ground bevel flat on the curved edge of the stone.
- Raise the gouge 5 degrees and rub it backwards and forwards along the stone until a burr appears along the full length of the cutting edge.
- Oil a flat oilstone, and rotate the gouge flat along it to remove the burr.
- The gouge is now ready for use.
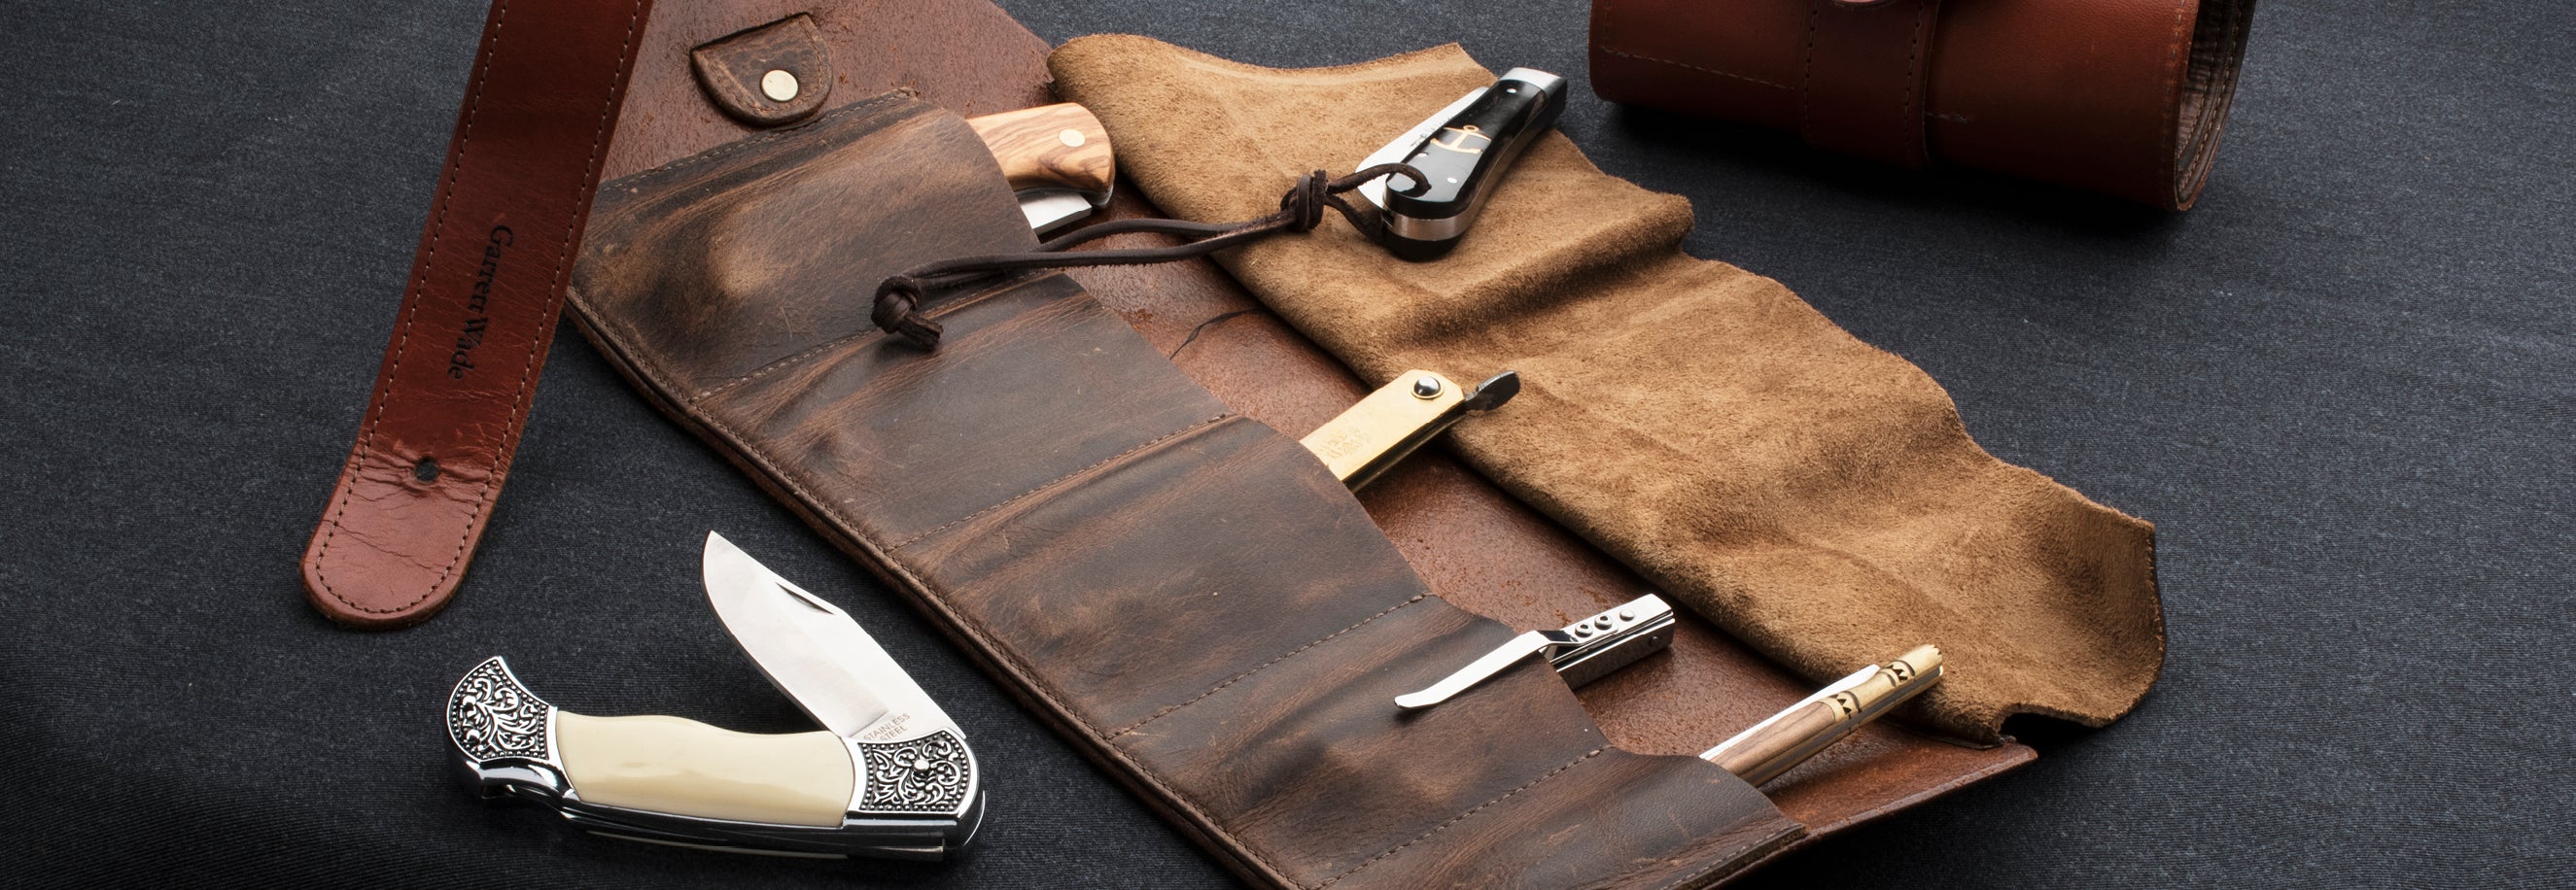
The best way to store gouges is in individual pockets in a canvas or baize roll, so the edges don't rub together. To prevent rust and preserve the final edge, place a small wad of cotton wool in the bottom of each pocket.
Check out our selection of gouges and find the right one for your next project.
Carving tools
Considered a carving tool, V tools have a different process for sharpening compared to the gouges and chisels which are covered above.
Sharpening vee or "v" tools
We recommend using a knife-edge slipstone. The edge must be extremely fine in order to work in the vee. It is essential both sides of vee parting tools are honed an equal amount and that the sharpest possible point is formed at the bottom of the vee. Use a flat stone to sharpen the outside. This will create a small ridge at the point of the vee. Use a knife-edge slipstone on the inside of the blade to remove this point and the burr.
Sharpening veiner tools
Veiners are U-shaped and are sharpened in either two stages, where each side and half the curve is honed, or three, where each straight edge is honed, followed by the curve.
Sculpting tools
Sculpting tools can be brought to an even finer finish by stropping on leather glued to a piece of board. A mixture of flour emery powder, pumice powder, or crocus powder and vaseline is rubbed into the leather and acts as a polishing agent. Rub the tool several times along the strop to produce a mirror-like surface on the ground bevel. The tool will move easily over the work and give a finer cut.
Check out our selection of carving tools and find the right one for your next project.
saws
A saw which has been in use for a long time or been abused will need topping, shaping, setting, or sharpening.
However, it is treated carefully, a saw will have been sharpened several times before any or all of the first three processes become necessary.
Once mastered, saw sharpening is a rewarding task - nothing works better than a well-set and sharpened saw. Correctly selected equipment will simplify the job and produce first-class results.
Topping or jointing
Hand and tenon saw teeth become irregularly-sized after prolonged use. They have to be leveled down to a regular height before they can be sharpened and set.
- Place the saw in a vice and fix a file in a grooved clamp.
- Run the file several times along the complete length of the saw blade. With badly worn teeth, it may be necessary to shape and top again in order to retain the correct teeth spacing. Remember to keep the file flat by using a topping clamp.
Shaping
Files for sharpening saws are specially made. In the past, they were double-ended. Today, they are triangular, and are supplied without a handle in a variety of sizes. The regular sized file for a rip saw is 7" long. The 7" and 6" extra slim and double extra slim are ideal for saws with 11 to 14 points per inch. Use the 4" extra slim for smaller teeth.
Usually larger saws and log saws are sharpened with a file which has its thicker edge rounded over so that round gullets can be filed. These files have single cut bastard teeth.
To shape the teeth, choose a slim taper saw file with a width of about twice of the depth of the saw teeth.
- Place the saw in a saw vise, with only the teeth showing.
- Place the file between the teeth ("gullet") and press down firmly with the left hand so that the file takes up the correct pitch of the teeth.
- Draw it straight across the saw and right angles to the teeth
- File each gullet carefully, ensuring that each tooth when filed is of the correct shape and height.
- Any flatting caused by topping will be removed.
Setting
Before any saw can work correctly, its teeth must be set alternately to the left and right. This must be done accurately, so that the points of the saw cut a kerf slightly wider than the thickness of the blade, and the saw moves easily through the wood.
A saw set will perform this task. It is fitted with a hardened steel anvil and a micro-setting screw which controls the distance at which each tooth can be set. Its trigger-type action makes it easy to use, and means it can be used on hand and circular saws.
Buy a plier-type of saw set if you will only use it occasionally. Adjust the pliers to give the correct set, and place them over the tooth. When you squeeze the handles, the plunger will push the tooth against an anvil. Set alternate teeth in this way, then reverse the saw and set the alternate teeth which you ignored the first time.
Teeth set by hand may have slight irregularities which must be removed by a side-dressing. This is done by running a slipstone lightly along the sides of the teeth with the saw held flat on the bench.
SHARPENING
Cross-Cut Saws
- Use a file to sharpen cross-cut saws.
- Position the file to work on the front edge of the first tooth set towards you.
- The file will also be working on the back edge of the left tooth, which is leaning away from you.
- Move the file handle over to the left until it makes an angle of 60 degrees with the saw.
- Give each alternate tooth several strokes with the file kept at this angle.
- The front edge of the tooth leaning towards you is then filed each time.
- Continue filing to the end of the saw, reverse it, and repeat the action.
RIP Saws
Sharpened in the same way as the cross-cut saw, but the file must be held at 90 degrees across the saw. File each alternate tooth on one side and then file each alternate tooth on the reverse side.
tenon and dovetail saws
Sharpened in the same way as cross-cut saws, but greater care is needed to maintain the correct tooth size and set. Saws with very small teeth may have to be returned to the manufacturers for setting and sharpening.
After sharpening
Lightly side-dress the saw with an oilstone to remove any burrs.
Check out our selection of collection of handsaws and find the right one for your next project.
scrapers
Use a burnisher or ticketer to sharpen bench, cabinet, and woodturning scrapers. All these tools have a fine steel edge which has to be turned over along its length by a burnisher, to form a burr. Several styles are available, with tapered blades in triangular, round or oval section. They are all fitted with wooden handles.
Bench scrapers are also sharpened on a wheel burnisher. This has a beech body fitted with an accurately-machined guide and a steel disk mounted centrally in the body burnishes a perfect cutting hook.
When it is new, a cabinet scraper will be square and straight-edged, but after prolonged use it will need to be reshaped. To do this, place it in the vise and straighten the edge with a smooth file. You can also rub the scraper on an oilstone to produce the same effect.
The edge will now be straight and fairly sharp and it must be burnished. The burnisher should be steel, harder than the cutter, and fitted with a handle for safety.
Place the cutter flat on the bench and draw the burnisher backwards and forwards across it about twenty times, pressing quite hard but always keeping the burnisher dead flat on the blade. This consolidates the metal.
Now clamp the cutter in a vise and, with the burnisher lying along the top of the cutter, draw it backwards and forwards, pressing quite hard. Gradually lower the handle of the burnisher so that it makes an angle of 15 degrees with the horizontal. This will turn the edge over to form the cutting burr. Repeat this on the opposite side of the cutter.
The cutter of a double-handed scraper is removed from the tool and beveled on both long edges. New cutters are supplied ground at 45 degrees by the factory, but they must be sharpened carefully before use. This is best carried out on a fine or medium stone maintaining the same angle. Use a light machine oil on the oilstone and remember to leave the stone clean and dry after use.
Sharpening the Cutter
When sharpening cutters, remember to always:
- Keep the burnisher lightly oiled to retain its high polish and to prevent rusting.
- Also, draw the scraper blade back into the double-handed scraper before putting it away lightly oiled.
- Rest the ground bevel flat on the stone.
- Keeping the cutter at this angle, move it backwards and forwards across the stone.
- As the cutter becomes sharp, a slight burr will appear on the flat face and when this extends along the full width, place the cutter flat on the oilstone with the bevel uppermost.
- A few light strokes up and down the stone will remove the burr. Always take great care that the back of the cutter lies flat on the oilstone, as any lift will round the back of the cutter and make it useless. It is an advantage if the corners of the blade are very slightly rounded.
Burnishing the Cutter
- Place it flat on the bench, bevel side downwards and, using a burnisher of the correct steel, draw it along the edge backwards and forwards about thirty times, pressing quite hard but always checking that the burnisher lies flat on the blade. On no account must the edge be turned over.
- Now, set up the cutter in a vise with the ground edge facing you and, with the burnisher lying on the 45 degree bevel, and pressing quite hard, burnish forwards and backwards.
- As the burnishing proceeds, gradually raise the handle until the burnisher makes an angle of 15 degrees with the horizontal. This may take up to 36 strokes, depending upon the pressure of the burnisher. A lubricant will make this easier. The edge will now have a definite burr and is ready for use.
Resharpen the Cutter
- Remove the burr from the flat side of the cutter either on an oilstone or with a dead smooth file, taking care not to create a bevel. If necessary, rub the cutter on the edge of the oilstone to straighten it.
- File or grind the edge to 45 degrees if necessary, and then sharpen as for a new blade.
boring tools
The sharpening of auger bits and other boring tools not only requires skill but the correct shape of sharpening tool. Buy a specially-designed auger bit stone, which is shaped to hone the spurs and cutters without making them too sharp and coarse, and abrading other parts of the boring tools.
When sharpening any bit, always observe the following rules,
- Remove as little metal as possible and do not over-sharpen.
- Carefully maintain the shape of the bit and never sharpen the sides, or they will bind when boring.
- Never try to sharpen a bit by grinding it.
Sharpening Jennings Bits
Generally speaking, Jennings bits are sharpened more often than necessary and the lives of many are considerably shortened by incorrect filing. Before sharpening, examine a bit carefully to see its profile, and try to keep this when filing.
Both lips of the bit should be filed equally. File them lightly with a smooth file or stone, removing as little metal as possible.
To sharpen the cutters, hold the bit with its screw nose resting on the bench and file the cutting edges on the underside only, i.e. with the file working through the throat of the bit. It is essential that the cutters are of the same height so that they cut chips of equal thickness.
To sharpen the spurs, hold the bit, nose uppermost, with its twist held firmly against the edge of the bench. File the inside of the spur. You should never file the outside as this reduces the clearance and causes binding and clogging when boring.
The cutter of a Scotch nose bit is sharpened in the same way as that of the Jennings nose bit.
Rest the bit on the bench with the screw lead facing downwards to sharpen the side wings. Work the file through the throat of the bit.
Sharpening Lamp Standard Augers
Take great care when sharpening lamp standard augers not to remove too much metal at the nose.
Hold the auger vertically in a vise. Using a dead smooth flat or knife-edge file, make two or three strokes flat on the lip of the nose. Usually, this is enough to restore the knife edge. Check that the center clearance is not obstructed - if necessary, draw the knife-edge file through to remove any burrs which have formed.
To sharpen the shell edges, hold the auger horizontally in a vise. Lightly oil a slipstone of a suitable radius, and move it forward inside the shell, twisting it to the left so that the leading edge of the auger is whetted.
Sharpen a Flat Bit
Sharpen a flat bit by placing it in a split block held in with a vise. Use a knife-edge dead smooth file or a small triangular stone to sharpen the forward cutting edges, maintaining the original angle and keeping the ground surface flat. Both edges should be sharpened equally. Sharpen the brad point if necessary, but maintain the centricity of the point by sharpening both its sides equally.
axes, mauls, and hatchets
To see the full steps and video, we strongly recommend visiting our guide on sharpening axes, mauls, and hatchets.
Axe and maul sharpening works best when the axe is locked in place. This way, both your hands are free to use the file for sharpening. With axes, your goal should be to get a clean, workman-like edge. That is, file away any dings or creases, until the cross section of the entire length of the edge looks simply like a vee. Keep sharpening until there are no flat spots along the edge.
To sharpen hatchets, your approach should be more indulging in the process than an axe. Since a hatchet is often used for more precise cutting jobs such as shaving tinder, splitting kindling, making stakes and shelters, and other camp craft, it can benefit from a much keener edge than an axe. We recommend a pair of stones that span from course to fine. In this case the double-sided diamond stone is 360/600 grit and the corundum waterstone is a 1000/3000 grit. As in sandpaper grit, the lower the number, the more aggressive the sharpening.
