null Skip to Content
How to Sharpen and Maintain your Axes, Mauls and Hatchets

How to Sharpen and Maintain your Axes, Mauls and Hatchets

How to Sharpen and Maintain your Axes, Mauls and Hatchets

A good quality axe can last your lifetime, and beyond, if it is properly cared for. One way to maintain your axe is by sharpening it yourself; it is a easy DIY project that anyone can learn. The great thing about DIY sharpening, is that it doesn’t require anything fancy, expensive, or “smart.” The sharpening techniques we show you here are all low-tech, take only a short amount of time, and exert only a minimum of physical effort. You don’t need wi-fi, you don’t even need electricity. The sharpening tools are so light and compact, that you can easily sharpen an axe in the woods while doing wood chores, or sharpen a hatchet in your campsite during a quiet moment. In the following videos and the accompanying text, we’ll show a few of our preferred methods of hand-sharpening your axes, hatchets and mauls. We will delve into a few other simple upkeep procedures, so that you’ll get years of top-quality usage from your chopping tools.

Axes, hatchets and mauls, at their most basic level, all have one job: to break up larger logs into smaller pieces of wood. Axes are generally used for chopping, as in felling a tree. They are designed to cut across the grain. After the tree is down, they can also be used to limb the tree, and to then cut up, or “buck” the trunk into smaller pieces, or rounds. While nowadays, chainsaws are generally used for these heavy-duty chores of felling and bucking, there is still quiet satisfaction in using an axe.

maul is used for splitting wood length wise, or with the grain. When you have bucked up a piece of felled tree into smaller rounds, say for campfire wood, or for fuel to burn in a stove or fireplace, a maul is used to split the rounds long ways, for a more manageable log. It does the same work as the more cumbersome combo of a sledgehammer and a wedge. The advantage of a maul is that it accomplishes this in one tool. See our short video, below, of a maul in action.
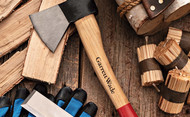
A hatchet is similar to an axe, but has a smaller head and shorter handle. Because it is lighter and smaller, it is meant to be used one-handed. A hatchet is great for camping use because of its portability; it’s easy to pack and transport, for either vehicle camping or for hiking deeper into the woods. Hatchets are more versatile than an axe, and arguably, you will get more use out of a hatchet, both around the campsite, and for general chores around the yard and woods. Hatchets require a bit more sharpening, for a keener edge, because of the nature of the more precise chores you might use them for, such as making kindling out of small logs, making tinder to start fires, or even for camp-craft projects like building simple, useful structures from limbs and saplings.

The procedure for sharpening these different chopping tools are similar and will be described in greater detail, and shown in the short, informative videos, below. So, take a few minutes to learn how you can easily sharpen and care for your axes, mauls and hatchets.

To Sharpen Axes and Mauls

Axe sharpening works best when the axe is locked in place. This way, both your hands are free to use the file for sharpening. Two methods we like are a) using a vise and b) clamping the axe to your workbench/table. To use this latter method, start by propping up the blade edge by placing a small block of wood underneath the ax head. You want the centerline parallel to the ground. Then, hang the edge of the blade about halfway off the bench.

Use a clamp that is deep enough to reach the center of the axe head. Clamp the axe in place, with handle parallel to edge of table.

It can be difficult to gauge the correct angle at which to sharpen your axe, and to see your progress. But here’s a secret: good axe makers will already have ground the axe at the optimal angle, so that the actual angle isn’t as important as consistency. That is, don’t worry so much about angles, but rather mimic the axe’s original angle. Pro tip: the sharpie trick. To give yourself a visual cue, take a sharpie and draw a 4-mm-wide mark along the edge of the blade, (as shown in the video). When you then sharpen the blade, the marker will disappear, and be replaced by a shiny, newly-sharped metal edge.

Most axes don’t need to be razor sharp. Sharpening an axe enough to shave your arm hair is a neat trick, but totally unnecessary. It’s a waste of time for a tool that will be chopping into dirt-encrusted wood. With axes, your goal should be to get a clean, workman-like edge. That is, file away any dings or creases, until the cross section of the entire length of the edge looks simply like a vee. Keep sharpening until there are no flat spots along the edge. Garrett Wade offers a coarse, 10″ flat mill file that is great for axe sharpening. Its relatively aggressive cutting action works quickly for touch-ups or big repairs. This tool is shown in the video.

Use full strokes and apply even pressure for the length of the stroke. Focus the contact on the edge of the blade. You should be removing sharpie ink from edge area only, not the entire 4 mm width of the marking. Adjust the file angle in your hands, as necessary, to accomplish this. A line of shiny, bright metal will show your progress, and indicate your edge is sharpening up nicely. Your goal here should be to simply file away any dings and flat spots on the edge. This process can also be used to sharpen a splitting maul, though a maul is hardly a “sharp” tool. It also applies to a garden spade, if used to sever roots while transplanting, cutting sod, or lawn-edging.

As an alternative to the mill file method, a double-sided diamond file works much the same, but is lighter, and can be used for a wider range of sharpening jobs. (A double-sided diamond file, offered by Garrett Wade, is shown in the video). As with the mill file, use full strokes and apply even pressure for the length of the stroke, focusing the contact on the edge of the blade. If you use the sharpie trick, then the ink will disappear from the edge area in much the same way as using the mill file. Again, a line of shiny, metal will prove your progress.

To Sharpen Hatchets

You should approach the sharpening of a hatchet with much more indulgence than an axe. Since a hatchet is often used for more precise cutting jobs such as shaving tinder, splitting kindling, making stakes and shelters, and other camp craft, it can benefit from a much keener edge than an axe. We recommend a pair of stones that span from course to fine. In this case the double-sided diamond stone is 360/600 grit and the corundum waterstone is a 1000/3000 grit. As in sandpaper grit, the lower the number, the more aggressive the sharpening. The higher the number, the finer the grit. Progress through each stone to the higher number. You can use the higher number to hone and polish the already sharpened blade. (It takes a frustratingly long time to sharpen a dull or damaged blade on 3000 or higher, so be sure to start on the lowest number.) Pro tip: You can also use the 360 side of the diamond stone to re-flatten either side of the waterstone, if the stone ever becomes dished in the middle. Just rub one surface against the other in a figure 8 motion.

To begin, spritz the surface of the diamond stone with enough water so that it pools on top. Spray bottles work well. The water acts as a lubricant and to float the miniscule metal filings to the top for easy clean-up, and so they won’t get embedded into the surface. For beginners, it’s best to think of the length of cutting edge of your hatchet in two or three distinct sections. Starting at the top edge of the blade, tilt the hatchet to your chosen angle, apply pressure downward while moving the blade back and forth over the top of the stone, with a slight rotation. Sharpen each section in overlapping phases, applying an equal number of back-and-forth sets to each section. Flip the blade over and repeat the process to the other edge of the hatchet. For a further honing of the blade, flip the stone over to the finer-grit side, and repeat the process on both sides of the blade. When done sharpening, rinse the surface of the stone with water to clear the metal filings. Let the diamond stone dry between uses.

If you have both the diamond stone and a corundum whetstone, you can get an even keener edge on your axe by using them in tandem. If you only have one stone, that’s fine. The corundum whetstone should be soaked in water for a few minutes before you begin. It’s porous and needs to be fully saturated. Begin by spritzing the surface to keep a puddle of water on top. This helps lubricate the stone and move the metal and stone particles away as you sharpen. Again, it’s best to think of the cutting edge of your hatchet in two or three distinct sections. Just like on the diamond stone, start at the top edge of the blade, tilt the hatchet to your chosen angle, apply pressure downward while moving the blade back and forth over the top of the stone, with a slight rotation. Sharpen each section in overlapping phases, applying an equal number of back-and-forth sets to each section. Flip the blade over and repeat the process to the other edge of the hatchet. To further hone the blade, flip the stone over, and repeat the process on both sides of the blade. When done sharpening, rinse the surface of the stone again with water let air-dry.

Mauls are a hybrid between a sledge hammer and wedge, combined into one tool. The head of the maul isn’t sharp like an axe, but does have an edge, to get that initial bite into your round. Mauls have wedged sides that quickly widen from the edge of the blade, to add weight to the head. When splitting with a maul, the downward force and weight of the head does the splitting.

To split log rounds with a maul, we find it helpful to use a pickaroon to assist in moving the pieces. A pickaroon can be used with one hand, as the handle is usually shorter than an axe. This tool has a curved beak, which not only bites into the log, but it also makes it easy to disengage the log with a simple rotation of your wrist. After a couple hours, this tool, which essentially extends your arm, will help save your back muscles because you won’t have to bend down as much. Use your widest, tallest, most stable round as a chopping block. Place the log you want to split onto the chopping block. Stand back from the block about the length of your maul’s handle. On the log’s splitting surface, you want imagine a line that runs from the center of the log towards you, (like slicing a pie) aim your strike at that line. Bring the axe down from overhead and slightly to the side, somewhere over your shoulder. If the wood is seasoned well, and it’s not too big around, you should be able chop through the round in one well-aimed swing. If the wood is green or wide, it might take a few blows. Depending on how big you want your logs, and how wide the round is initially, halve, quarter or even eighth your original round. Try to avoid big knots if possible, as the head might get caught in the knots. Look for existing splits in the flat of the round. As log rounds season, they often start to split naturally.

Care of the Metal Head and Wooden Handles

One other simple care procedure you can do at home with a few simple items is keeping the handle and head conditioned. If your axe came with a manufacturer’s sheath, definitely keep the head encased when not in use. This will keep the rust at bay, and help to keep the edge sharp. Bring your axe inside in the winter but avoid temperature extremes of the heated house or the totally exposed outdoors. (Too warm will make the wood handle contract, and possibly loosen the head from the shaft. Too humid will make it swell, crushing the wood fibers, which also leads to loosening. For more on this, watch our video on how to tighten or change the handle on your axe or maul).

Finally, when you have completed the sharpening, you can wipe down both the handle and head with any non-petroleum oil. We like linseed oil as a good, all-purpose oil for both metal and wood. Another personal favorite is the brand Ballistol, an all-purpose lubricant originally created for use on the metal and wood parts of firearms. This lubricant, in its distinctive red and green packaging, comes in spray cans and individually wrapped wipes. We love the wipes because it’s easy to swipe them back and forth along the length of axe handles.

With a few hours of proper care every couple of months, a well-crafted and oft-used axe can last you a lifetime. Axes, hatchets, and mauls, are easy to sharpen and care for at home, if you learn the proper procedure, and own just a few of the right tools. Follow these few simple steps for upkeep, and you might just be handing your favorite chopping tools down to your kids or grandkids.

Written by Garrett Wade

Latest Posts

A link back to the top of the page.