null Skip to Content
 Loom Large: Weft and Warp Speed Ahead

Loom Large: Weft and Warp Speed Ahead

Loom Large: Weft and Warp Speed Ahead

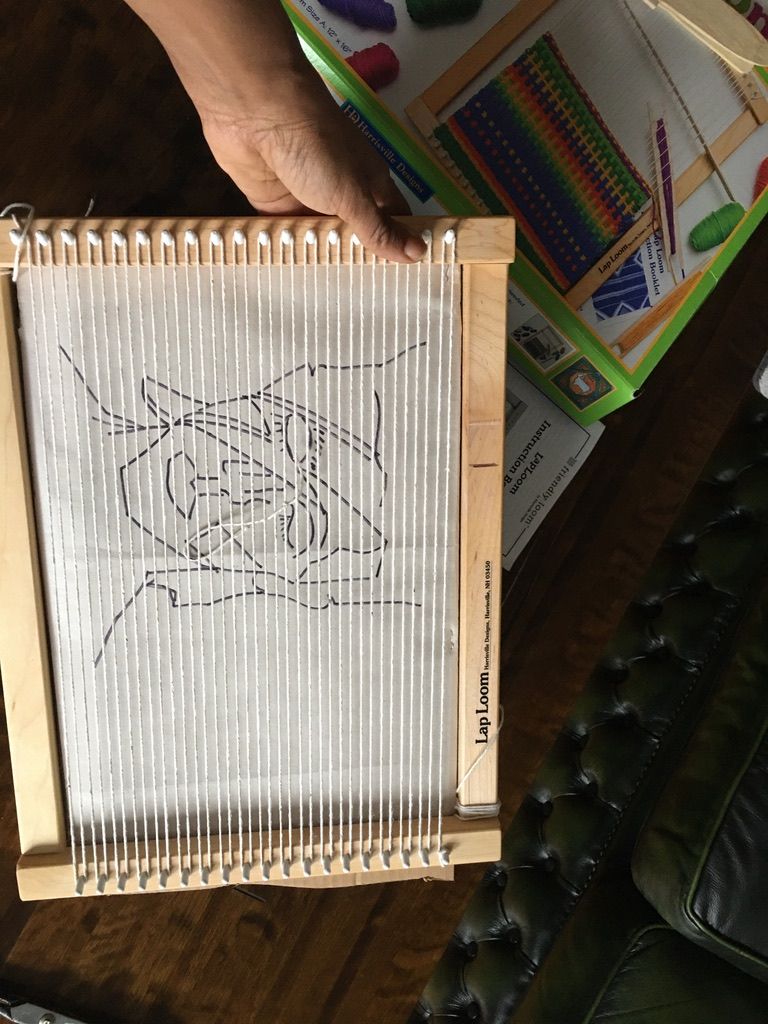
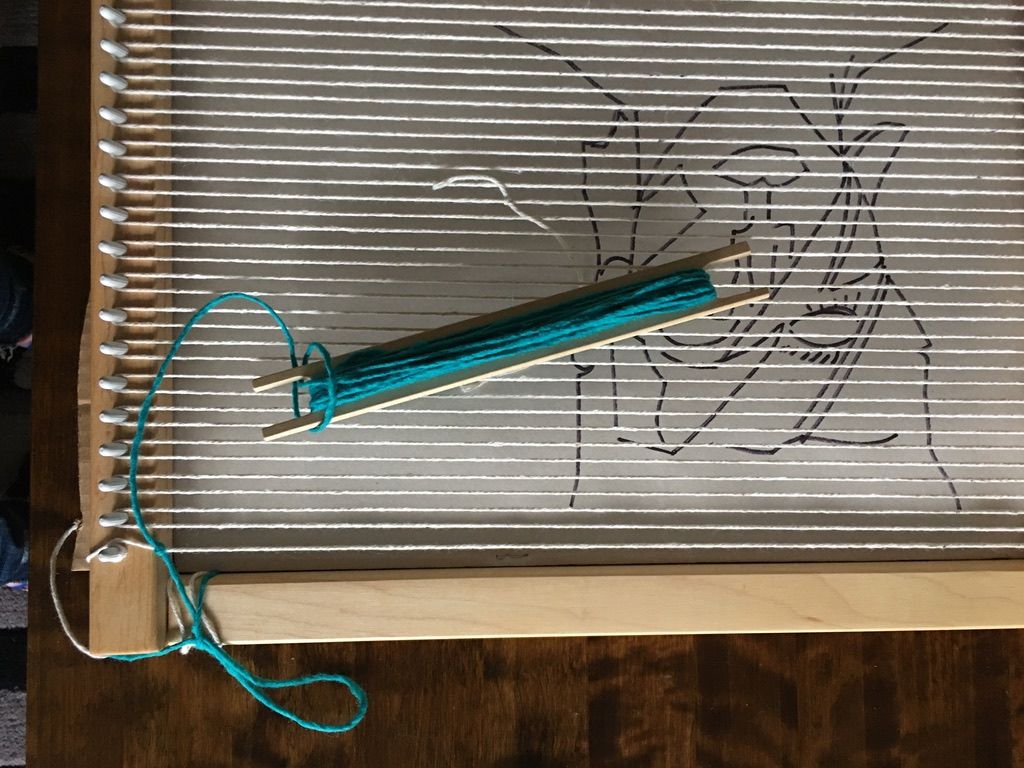
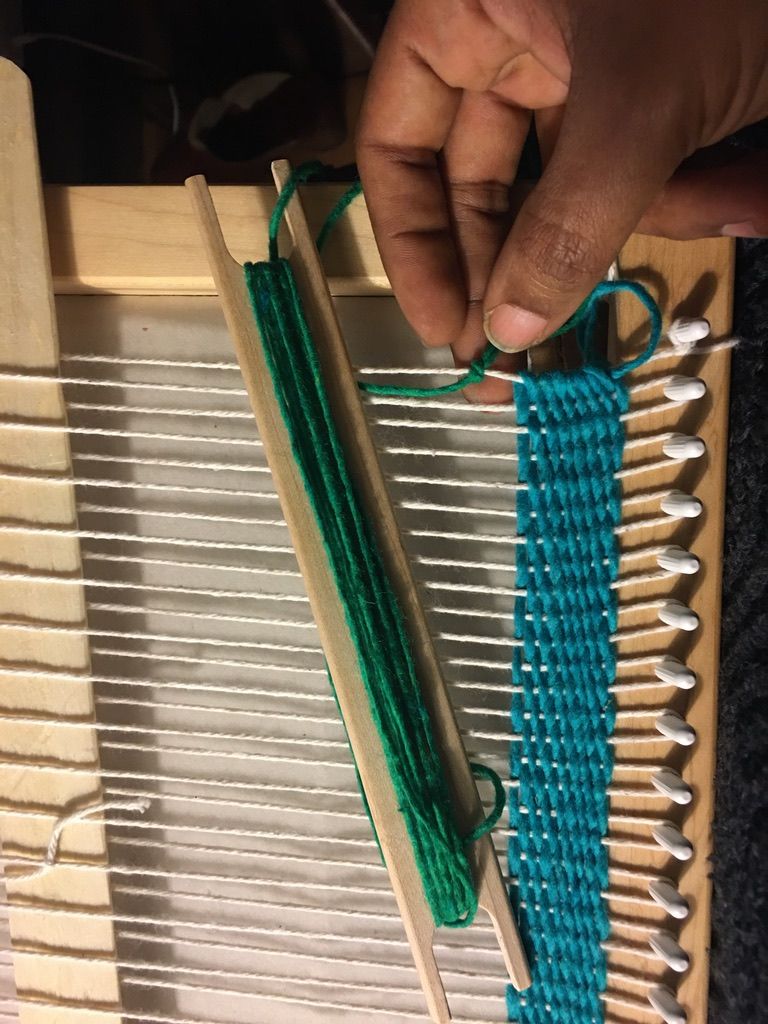
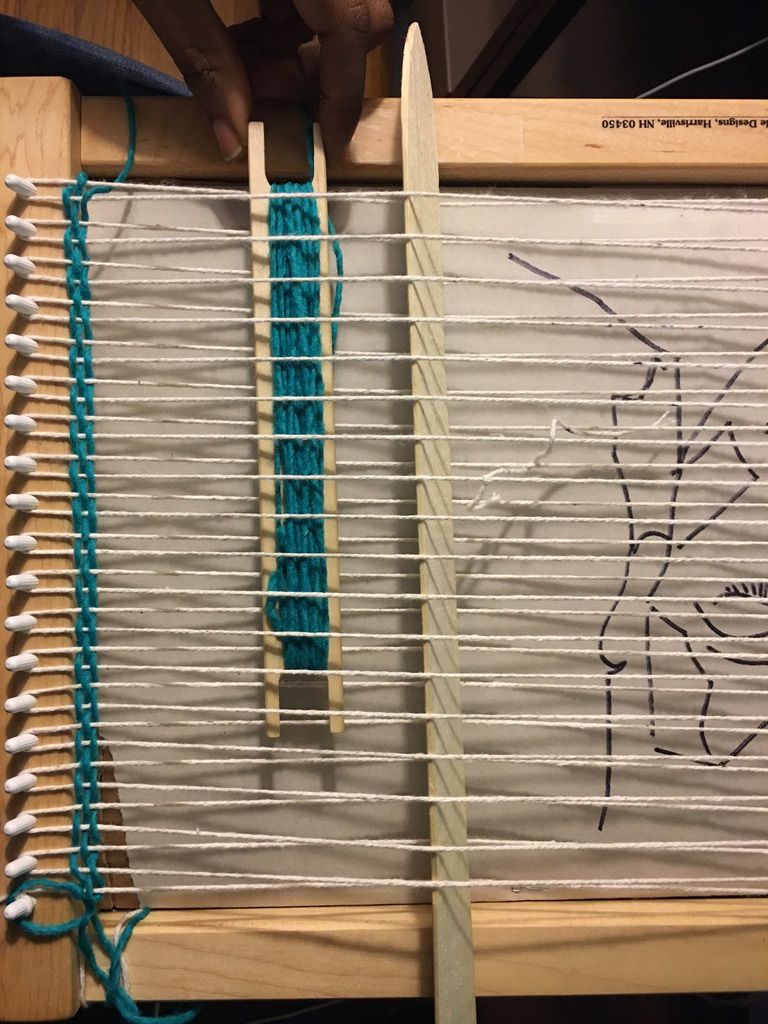
If you’re looking for a low-key creative outlet that will bring you tranquility and yield unique holiday gifts, then laploom weaving is for you. You don’t need special skills or training to begin and the start-up costs are minimal. Most weaving kits come with everything needed for a first project, everything else can be improvised from common household items. However if you are a quarantined crafter, you probably have a cache of materials too precious to throw away but too small to use; they are perfect for the loom. Think outside the yarn--if it can be sandwiched between warp and weft, it can be upcycled into your loom-based project. Right now people are loving hand-woven work as evidenced by a quick search on DIY craft sites. Hot off the loom shoppers are scooping up placemat and coaster sets, bookmarks, sachets, runners, and diminutive wall hangings to soften the look of their homes and personalize their accidental home offices. Perhaps owning a woven work of art reminds people that seemingly disparate threads can be thoughtfully knit together to form something of beauty and value.

Finished Loom

Or maybe it’s just cool to have something that no one else has. Regardless, why not take up the charge and get weaving?

A few months into the pandemic I joked with a friend that I’d run out of craft ideas and would start recreating David Bowie album covers. Well here’s the punchline. (image) It took me about 20 hours plus a bingewatch of the final season of Breaking Bad to complete the loom work, and 5-6 hours to design and mount the finished piece. I found the rhythm of the weaving to be meditative and calming after a long day of Zoom and home office work and it was satisfying to see the tapestry come together with each pass of the stick shuttle. I was so happy with the results, that I decided to keep it for myself. However, I am already planning a new piece to try everything I learned from the first one. Of all the new pandemic hobbies I have tried, weaving is one I think I will stick with and I hope you enjoy it as well. To that end I have written this piece to provide basic instructions on weaving a tapestry on a laploom. It also highlights the beginner weavers’ mistakes I made so you can avoid them, fix them, or at least know that you are not alone.

Step One: Get a loom kit.

The hardwood loom comes with detailed instructions and:

Warp and Weft Yarn

Shed Sticks

Tapestry Needle

Stick Shuttles

Yarn Tip: There is enough yarn to weave a piece as large as the 12”x16” frame and a good selection of colors. Resist the temptation to buy yarn and try to work with what you have for the first piece. You will end up using more yarn that you think, so hold off on expensive yarns that you would use for garments.

You will also need:

  • A tapestry beater (you can use a fork or a wide tooth comb)
  • Scissors
  • Paper clips, clothes pin, tape or other fasteners
  • Cardboard and paper
  • A broad tip marker

Step Two:Check out your equipment.

Count the pegs on the loom and look at the size of the frame. Handle the shed sticks and shuttles. Take stock of the wool yarn. Look at the colors, tie a few knots and pull on the string so you can get a sense of its elasticity and breaking point. Feel free to take a whiff, yep, smells faintly of sheep. Notice that the yarn is not “chunky”, so do not expect the weaving to go quickly. The bundle of white string, which has a different texture, will be the warp. The warp is the yarn strung on the loom before weaving. The weft is the yarn woven through the warp as the filling for your design. The terms warp and weft often get confused; blame alliteration.

Step Three: Plan and map your design.

When designing your project be realistic about what you can render in yarn. My first instinct was to make an alternating pattern. This is more complicated than it looks because designs such as diamonds, zigzags and chevrons require following a strict pattern. Deviations from the pattern stand out and can disappoint and frustrate a new weaver. For your first piece consider an image that is easily identifiable or just make the tapestry abstract. I didn’t want to spend a lot of time on design since I wasn’t sure how it would go so I chose an image I liked, printed it out, and then reduced it to simpler forms. I then traced over it with a marker on a second sheet of paper and attached the drawing to cardboard cut to fit behind the loom. I made sure the sides of the cardboard extended past the end of the loom so that it would be stable on my lap. Finally I marked the corners so I could line it up each time. With my template behind the loom I used the marker to make guidelines for my design.

Step 3 design

Step Four: Prepare the Loom and Yarn

I used the entire loom, but you don’t have to. The number of warp strings depends on the design, however there seem to be practical advantages to having an odd number of them. Do not try to measure out how much warp string you need, it’s deceiving. Find the loose end on the skein of warp yarn and tie it to the first peg on the loom. Use a double knot, and leave a tail because you never know. I wrapped the extra yarn around the loom to keep it out of the way and ended it using it to finish the edges after I removed the piece from the loom. Wrap the warp thread over the pegs (pic), then tie and knot the string on the final peg just as you did for the first one and leave a tail. The warp should be taught enough to remain stable on the pegs but loose enough to allow you to insert the shed stick to create a space for you to pass the stick shuttles through. Test it and adjust the tension as necessary.

Decide what color you will use first and load up your stick shuttle or create a yarn butterfly by wrapping the yarn in a figure eight around the pinky and thumb of your outstretched hand. Tie one end one the yarn to the first warp string and leave a tail.

step 4 prepare your loom

Step Five: Weave!

For this example I will be explaining a plain weave in which the weft alternates over and under the warp strings. Take the shed stick (or ruler) and weave it over the first warp string, then over the second, under the third, over the fourth and so on until you get to the last warp string. Turn the shed stick on its side to create the shed, the space through which the shuttle will pass through, and send the shuttle through.

step 5 weave

Shuttle Tip: The first time I loaded the shuttle with so much yarn that it exceeded the width of the shed stick and I couldn’t get it through. Don’t be me, keep your shed shuttle slim.

Once you get to the end of the warp unwind the shuttle so you have enough yarn free for the next shuttle pass. Use your tapestry beater to push the yarn as close to the pegs as possible. This will create a clean edge to the tapestry when you remove it from the loom.

You can see that I did not do this when I started my piece and so I had to make some adjustments at the end to finish the edges.

Slide the shed stick away from the yarn you just wove but do not take it off the loom; you will use it again shortly. Weave the other shed stick through the warp to create a shed for the second row. If the first row started above the warp thread, then the second should start under and vice versa. This will create the weave. Made the second shed, send the shuttle through, and then beat the work. Remove the second shed stick from the loom and bring the first shed stick towards the work. Turn it to the side and you’ve got a shed for a third row that is identical to the first one but without having to weave the stick through again. Et voila, you’re weaving. Continue this way, tamping down the work after each shuttle pass and you will begin to see a pattern emerge. If you run out of thread or want to change colors you have two options. Tie a new piece of yarn to the old piece, knot it securely, or leave a tail that you can tuck in later and knot a new piece to the warp thread and keep going.

step 5 weave and shuttle your yarn

If you are working on smaller sections, details, or want to create textures you might prefer using the needle instead of the shuttle. The needle can be used with or without the shed stick and is indispensable when you get to the pegs at the other end and you no longer have space for the other tools. I found that I preferred working with the needle as it broke up the rhythm and allowed for more experimentation with the stitches.

You may find that the tapestry is shrinking while it’s growing. This is not an illusion. While you were settling into a shed making groove, you may have been pulling the yarn too tightly on the outer warp threads. I certainly did. (pic) You have options: You can unravel the work and start again paying close attention to keeping the sides parallel and take measurements to ensure uniformity. You can spray the finished piece with warm water and reshape it as best you can. Or you can question why you think your piece has to be at right angles and embrace the unique form that your tapestry is taking and weave on.

Experiment

I wanted the background of my piece (everything but the face) to be freeform, which would give a novice like me room to experiment. I researched basic stitches to add texture and used a combination of plain weave, twill weave, basket weave, cross weaving, and soumak weave. These stitches were simple to create, easy to pull out, and did a great job of “happy accidents”. I also did a fair bit of winging it and seeing how many different ways I could get the weft to stay on the warp. Feel free to check out Pinterest for stitches but don’t fall down a rabbit hole. There are many tutorials and a lot to learn, but nothing beats just jumping it and seeing what happens. No tutorial is going to show you exactly how to make your unique piece. I’d also advise against copying designs from online. Find your own inspiration so that you don’t feel like you have to announce your tapestry by lowering a small screen in front of three skeptical judges and yell “Weave’d it!”.

Step Six: Finish the Work

Weave all the way to the pegs at the other end of the loom and then beat the thread like it owes you money. You want the weave to be as tight as possible and, as I have said before, yarn is both malleable and deceiving. I thought I was done with my piece, but after some beating saw that I had about another ½ to ¾ inches until the pegs. Using the needle, I fought my way through the last few rows. Sadly there was still room at the other end where I had neglected to heed the instructions about starting the work as close to the pegs as possible. I improvised using a yarn that I purchased online. I almost sent it back because it wasn’t what I was expecting but it made a good border and it brought the work right up to the pegs on both sides. It was also a struggle to weave with.

step 6 finish your loom

Now is a good time to eliminate or secure any loose threads. You can weave them into the work or tuck them through the back. Some people like to see the back. It’s up to you. I think it looks interesting and attests to the handmade nature of the tapestry.

Remove the Tapestry

I am not ashamed to say that removing the work from the loom made me nervous and I was afraid the whole thing would unravel. However, the warp is there to save you. You cannot slide the woven part past the loops so it is safe except for the knotted warp ends. I started with one of the corner pieces and slowly slid the warp off the pegs. When I got to the warp yarn that was double knotted I unwound the tail and knotted it to make a loop. I then wove the tail into the tapestry and raised my hands as if I had made a field goal because it worked. I did the same for the other warp thread end.

remove the tapestry

Display

There are myriad ways to display your piece. I am not a fan of the usual display method of attaching the tapestry to a rod and then tying a string to it. And I know that if I decided to give it to a friend they might struggle to work this bohemian look into their décor or may not want to put another nail in the wall. So I put mine in a frame that can be hung or propped up on a shelf. A framed piece looks great coming out of the box and it can always be taken out and hung in a different way by the recipient. How you present your gift is up to you, but it’s a good idea to consider the style and lifestyle of the person to whom you are giving it.

Written by Jacquetta Szathmari

Latest Posts

A link back to the top of the page.