
Japanese Garden Tools Vs. American: What’s the Difference?
You may have seen Japanese gardening tools popping up more in stores and online. Sure, they&rs… Read More

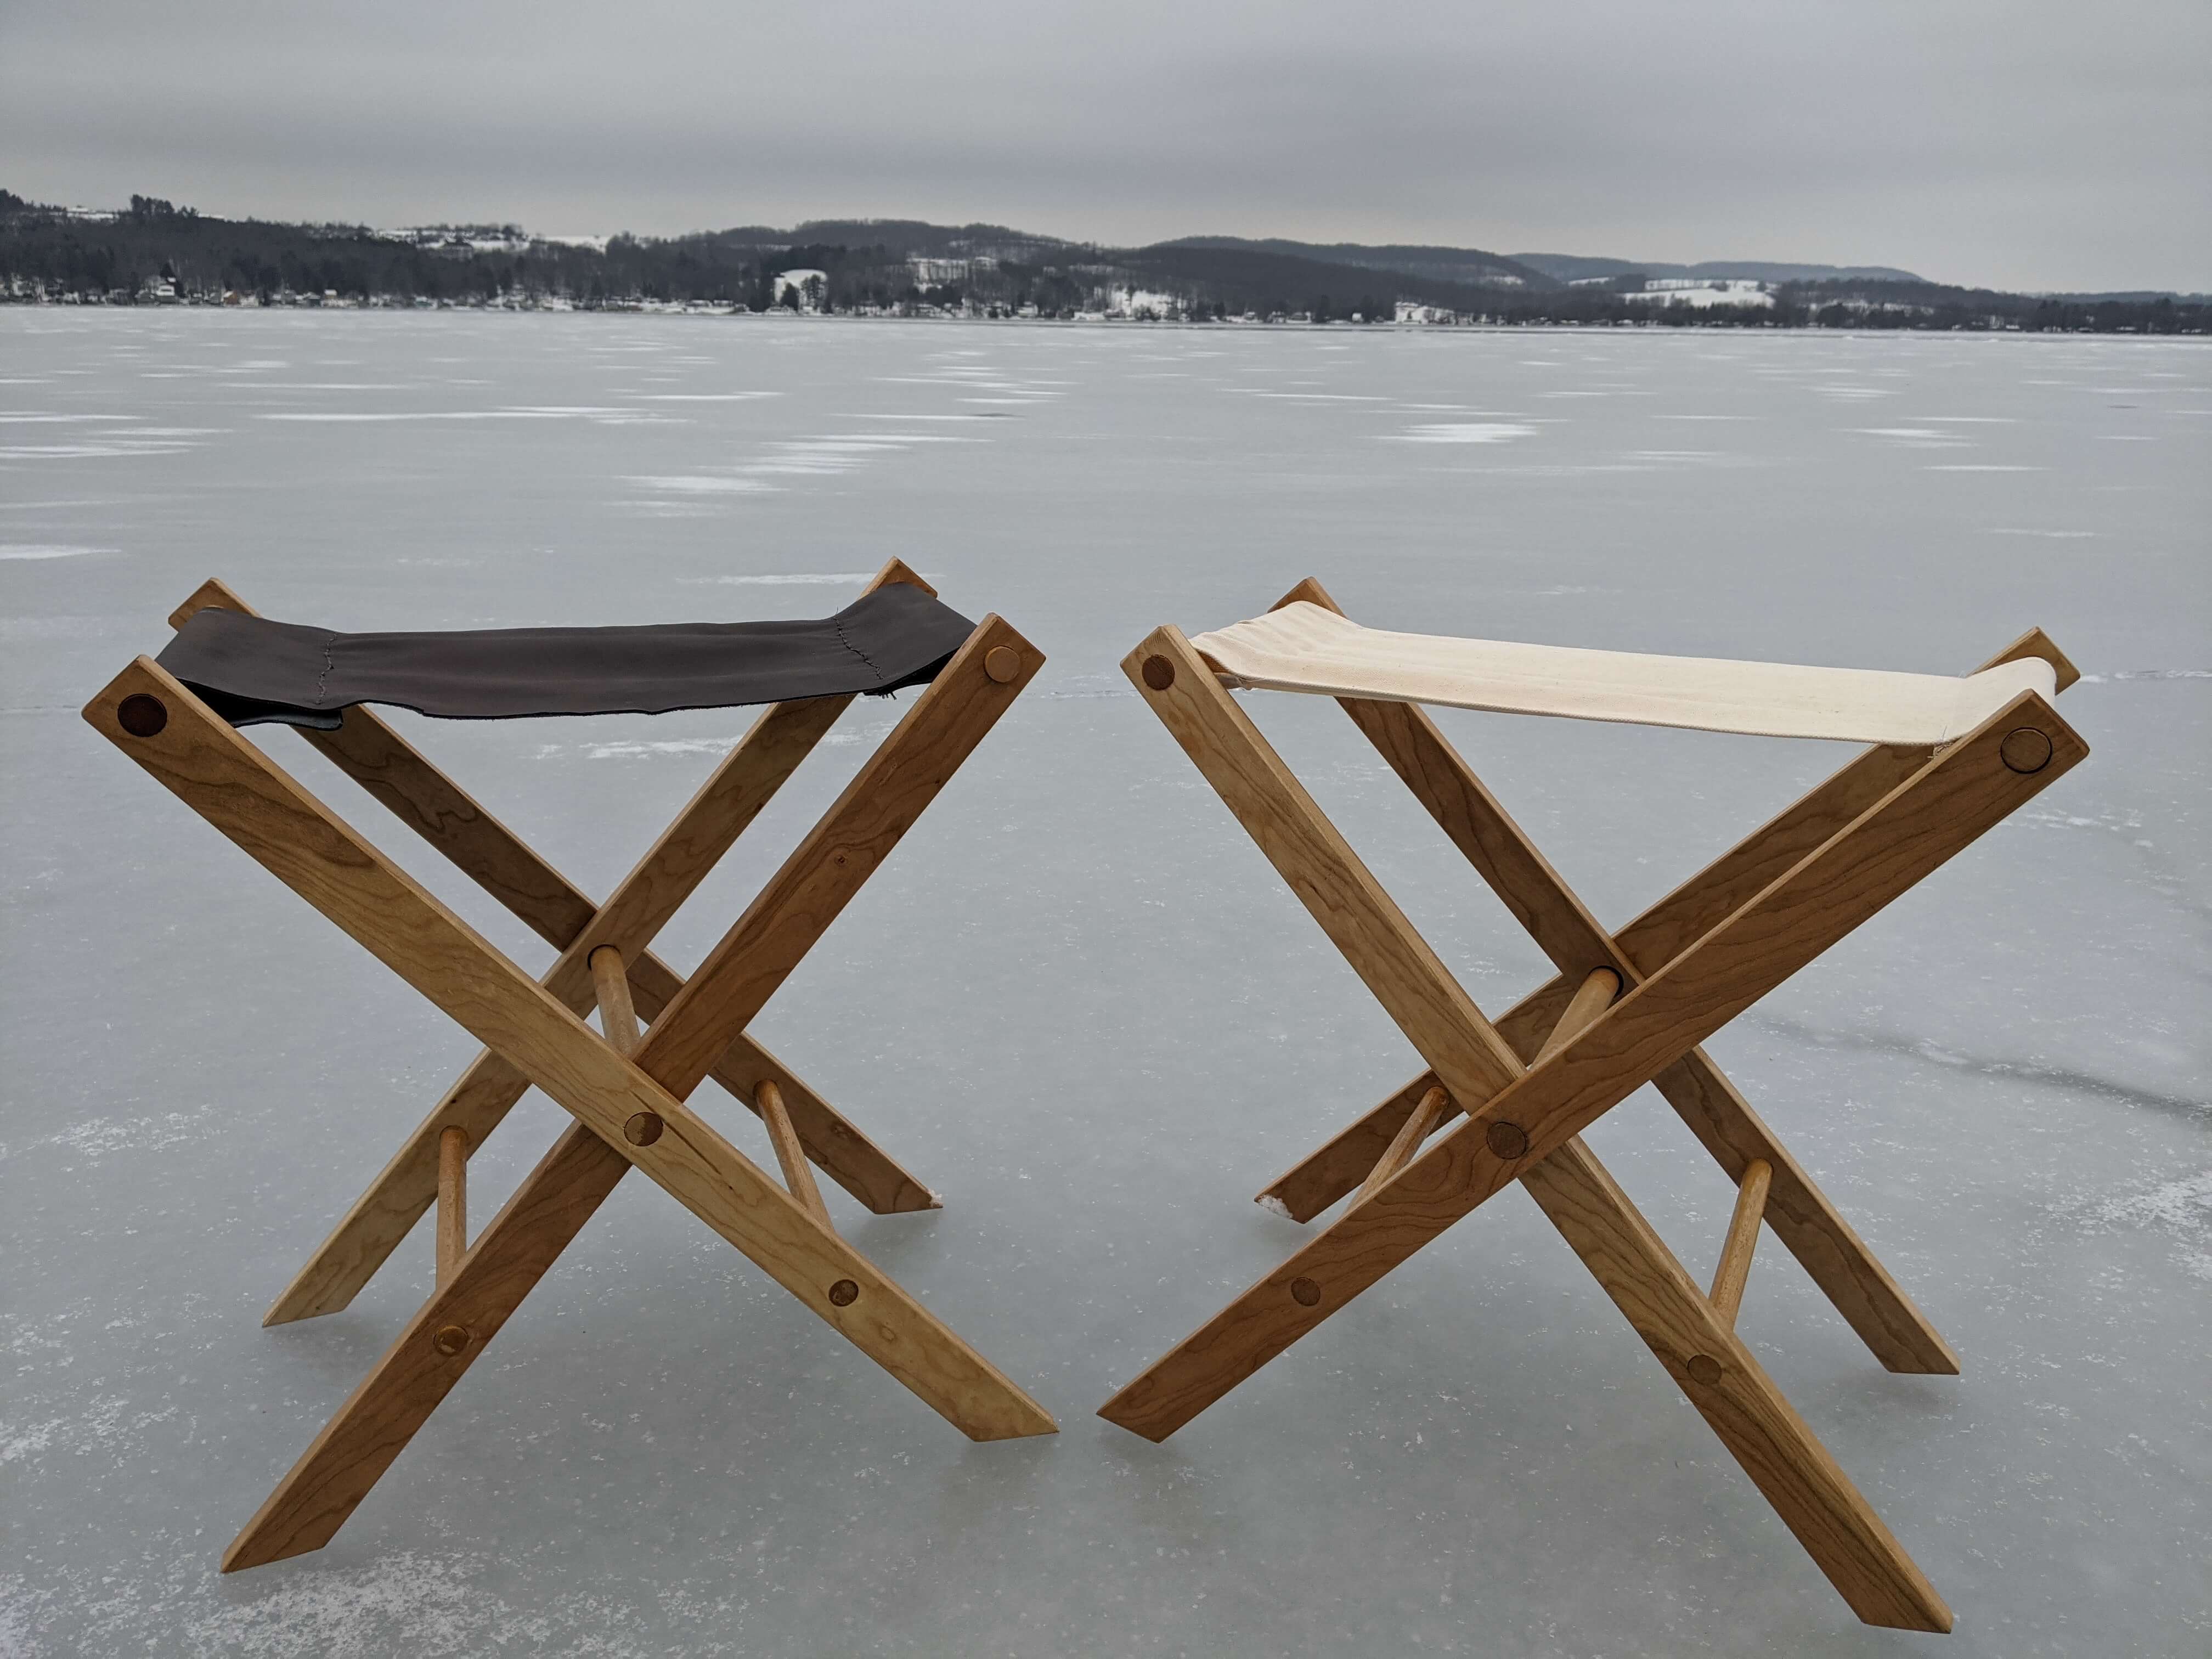
How To Build A Folding Camp Stool
Imagine the following scenario: You go to your friend’s house for a socially distant bonfire. They’ve thought of everything! The food has been artfully and safely prepared, each seat is placed 6 feet apart, and a myriad of lawn games are available. There is only one problem: the host miscounted, and they find themselves one lawn chair short.
You immediately quell the mounting panic in their eyes with the following phrase, “No worries, I have a folding camp stool in my car.” It’s patiently waiting for you, folded up in the trunk. You bring it out and everyone asks where you got it. You answer, “Oh this? I made it.” Amazement and awe follow your statement, and, even better, everyone has a place to sit and enjoy a wonderful evening.
This scene is one of many where your folding camp stool can come in handy. If you’re interested in learning how to build a stool, Garrett Wade has the expert advice you need. Follow along with our woodworking master to learn moreabout building this stool from scratch!
An Easy Build with Attention to Detail
All that you need for this folding camp stool project are a few basic tools and a willingness to sew some straight seams. You can hand-sew the seat or use a sewing machine if it can handle heavy weight fabric or leather. You canalso modify this project to have a wooden seat if you don’t want to sew.
This is a great introductory project if you’re interested in furniture building. The assembly of this folding camp stool requires snugly fitting round tenons (dowels) into drilled holes and securing them with wood glue. The key to success with this project is the adage “measure twice, cut once.” You may even want to measure three times. The measurements need to be accurate for the chair to fold properly because it’s composed of two halves: a wider outer static half and a narrower inner dynamic half.
Since this project is metal free, the chair may creak when you sit on it at first, but, in exchange, you get a sturdy and lightweight design. Ready to get started? Follow along as we teach you how to build a stool!
Tools & Materials
Tools:
Materials:
Instructions
I. Prepare the Legs of the Folding Camp Stool

The first step of learning how to build a stool is creating even, straight grained legs.
Each leg needs three holes:
i.Top braces - 7/8” down from top and 7/8” diameter
ii.Central axis brace - 15” down from the top, 7/8” diameter on two exterior legs, and 1” diameter on two interior legs
iii.Bottom braces - 22” down from the top and ¾” diameter
It helps to label which legs will go on the inside of the axis and which two go on the outside. Aside from the different size holes for the central axis, each leg for this folding camp stool should be identical.
i.Make Four Cross Braces & Central Axis

II. Drill Your Holes


With your drill press and spade bits, drill the holes marked on your folding camp stool legs, being mindful to center them properly. To avoid tear-out when drilling, drill until the center point pokes through the other side, then flip the piece and drill from the other side using the center hole to guide you. If you do have some tear out on one side, strategically hide it on the inside of the axis point.
III. Chamfer and Plane Legs

Smooth the sharp corners of the folding camp stool legs by chamfering with the spokeshave or block plane. Go over the sides of each leg as well until they all have a smooth, even surface. If your grain is wavy, a cabinet scraper is a great way to even out the surface of each leg.
IV. Fit Together the Frame (Minus Top Braces)
")
First, test the fit of each tenon and hole. It’s very common for the dowels to be too large for the drilled holes of the same measurement. If this is the case, remove wood very carefully and evenly with the spokeshave from the final inch of each dowel. Sand to remove tool marks and re-test the fit. Each tenon should have a very tight fit in its drilled hole.

When you’re satisfied with the fit of each tenon, it is time to glue the pieces of the folding camp stool together.

V. Finish Frame

Once the frame of the folding camp stool is assembled, and the glue has cured, saw off any braces that extend beyond the legs and sand all joints and surfaces. Apply an even coat of the finish of your choice. If you’re using anything other than oil, make sure not to get the finish too close to the dynamic joint of the central hinging brace. Apply the finish to the seat braces as well, because these will be assembled with the seat on and will be hard to finish after assembly.


VI. Sew Seat

While the finish dries and cures, it’s time to sew the seat of this folding camp stool.
For Leather...

VII. Assemble the Seat

Slip the top braces through each sewn brace end of the seat. The width of the sewn seat should just meet the legs on the inner (dynamic) half and be an inch short on the outer (static) half.
Run the seat braces through the holes on the tops of the chair legs. Since the chair is mostly assembled and has very little bend to the legs, it’s helpful to make the top braces slightly loose so they slide through one side twice as far. This gives you just enough room to fit the brace into the other side.
Even out the braces, but don’t glue them! You want them to be removable for easy seat cleaning.

Time For Your Adventure!
Now that you know how to build a stool, you can go anywhere with the confidence that you’ll always have somewhere to sit. Try out this build for yourself and let us know how you like your new folding camp stool!
Looking for other woodworking tutorials? Our blog is full of DIY projects. Explore our collection of guides for crafts big and small!
You may have seen Japanese gardening tools popping up more in stores and online. Sure, they&rs… Read More

Imagine if you could save the earth by starting a fire in your garden. Sounds crazy? Maybe,… Read More

Pollinator gardens have been in the news these last few years. Most of the articles focus o… Read More