


Alright, crafty ladies and gentleman. It’s getting very cold outside, and you know what that means. All those expensive craft tools and supplies need to go somewhere safe, dry, and above freezing temperatures. Follow these tips to help your supplies last through the cold weather.
First off, if you have anything liquid such as wood glue or paint, if you can find a place for them inside, that is ideal. You don’t want to allow these things the chance to freeze and expand, busting the containers. Using a storage box with a lid, line it with blankets or extra insulation if you can. Place your liquid items inside of the box and cover it with the lid. Store the box in an attic, basement, or garage (if you can’t find a place inside).
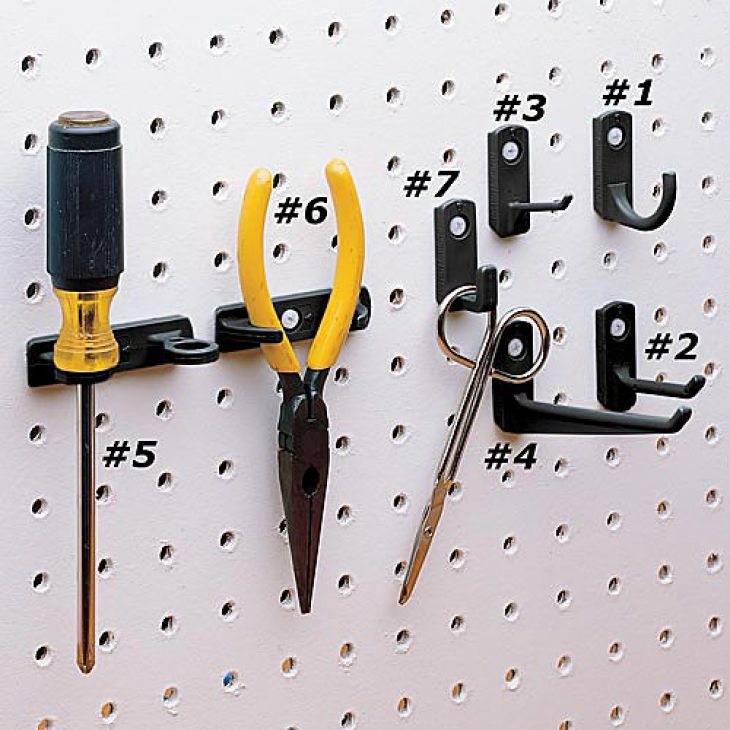
As for keeping tools out of the way, I’ve found the most efficient and convenient thing to use is a pegboard.
- Create border out of wood. Thickness of the wood should allow for the distance from the wall so that you can hang items up.
- Attach pegboard to border and mount on the wall.
pegboard hooks, hang your tools.

For larger items, such as handheld sanders, saws, etc. I use an old set of drawers from my local Goodwill. It keeps them out of little hands’ reach. The ones I found used to be in a kitchen, so there was a pretty good amount of space there for everything I needed. I just sanded them down nicely, added a fresh coat of paint and replaced the tops of them and they are as good as new! If sanding is a bit new to you, here’s one helpful guide for sanding as well.
If you do not have the space for the drawers, shelves work just as good, however, make sure the shelves have a ledge on them so the tools can’t just fall off.
As for any other items you may have laying around, jars and baskets are your best friend. I know it sounds too simple, but they really do work the best for those extra sets of gloves or the paint stirrers you have laying around. We hung the baskets up on the walls to serve as multifunctional shelves.
Basically, my garage is full of shelves everywhere just to make sure that no children accidentally get into something that could hurt them. It also makes the garage look ten times neater. Another advantage is that by using shelves and getting everything off of the floor space, we are able to keep the car in the garage as well.
If you use horses to hold up your work as you go, you may want to just go ahead and get the ones that fold all the way down. Using these, we are able to fold them and hang them up as well.<
By having all of your items using wall space, you are allowing yourself more workspace on the floor. We also have tarps that we place under our work to protect the floor and make cleanup a little easier. When we aren’t using them, we fold them up and place them in a drawer.
During the colder months, you may not even really feel like getting out and crafting so another advantage to hanging everything up means keeping it out of the way while you’re not using them and not allowing them to clutter your life. I hope these tips were helpful to you and your crafting storage needs. Happy crafting!


