null Skip to Content
Leather Permitting: Your First Leathercraft Project

Leather Permitting: Your First Leathercraft Project

Leather Permitting: Your First Leathercraft Project

With limited workspace and a few leathercraft tools you can teach yourself the skills to create and complete your first leatherwork project. The most basic projects require a stable knife-resistant work surface, a few sharp leatherwork crafting knives, a straight edge, and leather. However, many early projects will involve sewing, gluing, hole-punching and metal elements such as snaps and rivets which require special equipment. Luckily none of these tools are costly, heavy, or take up much space and they are all very simple to use. A good first project, such as this DIY-chic card case will allow you to practice basic leatherwork skills while you experiment with the tools and material. To make the card case you will need the following:

  • Set of bevelled leather knives – Right and left bevel knives with a straight-edge to make straight cuts with a precise square edge.
  • Round knife (also called half-moon knife or head knife) – The quintessential leather craft tool, used to make straight and curved cuts. To see the knife in action and save time watch this short video of how to hold and use a round knife. The full Garrett Wade Leatherworking Knife Set can be found here.
  • Straight-edge – Choose one that can resist cuts from a blade.
  • X-acto knife
  • Leather groover – Hand-held tool that carve a light groove in the leather to make a guide or channel, also used to skive (shave down) leather.
  • Set of Chisels – Pronged fork-like tools used to create evenly spaced holes for stitching.
  • 12”x122-4 oz. Leather Square – This will make 2 card cases. For this project choose leather that is already tanned and dyed. If you have never purchased leather before, as I had not, look for “tooling” or “craft” leather but don’t get sucked into the leather hides rabbit hole.
  • Leather glue
  • Cutting mat – This will protect the work surface and tools and provide cutting guidelines.
  • Hammer or mallet
  • Anvil*- I did not have one and so used the hardest surface I could find, a cement floor.
  • Snap fastener kit and hardware
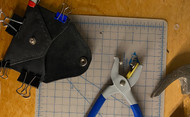
  • Hole punch* - If you don’t have one, you could use an awl but it will take some effort.
  • Beeswax
  • Leather burnisher/slicker* - Curved wooden tool used with wax to smooth the leather edges. You can substitute household objects for this—I used a champagne cork.
  • Bevel knife* - Tool that shaves off the sharp edge of a piece of leather creating a rounded edge. I did not have one handy, so I made do with an inexpensive skiving knife with removable blades. The knife is the same type as the ones formerly used to remove calluses in pedicures.
  • Skiving knife*- Shaves down the thickness of leather. Skiving knives come in a variety of sizes and shapes and it is possible, with practice and patience, to use a round knife to skive.
  • Leather sewing kit – You can purchase a kit that includes thread, needles, an awl, a thimble and so forth, or you can assemble your own. For this project I only used one “glover’s” needle, less than 1 meter of flat waxed 1mm thread, and wax.
  • Clips – To hold the leather in place while glue sets.

1. Create a template

After setting up your workspace and gathering all the materials and tools, create a template for your project and gently trace it onto the leather with an awl. Our template is easy to recreate and there are many free templates online. The finished case is approximately 4.5” x 3”.

2. Cut out the leather

Using a straight-edge make a straight cut from the top of the leather to the bottom so that you have a piece of leather the width of the card case. Now you have a smaller piece that is easier to maneuver. Use the beveled knives or round knives to make straight cuts and use an Xacto to get into tight spaces.

To make the rounded edge of the flap cut closer and closer to the rounded part with the round knife for a smooth curve. Then do the same on the other side until the cuts meet. If you accidentally cut more than you should, don’t panic. You can trim the corresponding side to fit it. Also, this is your first piece so expect happy accidents that you can learn from. Mark the location for the snaps and make sure the pieces match up.

3. Prepare the leather for assembly

Before assembly you need to reduce the thickness of the material at the seams, edges, and folds. This creates a finished look and makes it easier to put the card case together. Adjust the groover so that it will create a stitching guideline approximately ¼ inch from the edge of the leather. On the rough side run the groover around the perimeter of the two pieces. This groove will show you where to skive, or shave down, the leather. To skive start the knife at the groove at an angle and push it towards the edge taking care not to cut the skin. Use scraps to practice before working on the project leather. I stubbornly attempted to skive using the round knife because it is known to be an all-purpose cutting tool. I would give the results a solid C+, which is still a passing score. The edges will look rough after skiving, but you can smooth them out with fine grain sand paper before burnishing.

If your leather is very stiff, you may opt to skive the areas where it will be folded—just make sure to do this on the rough side only. Skipping these steps won’t ruin the project, but it may make the construction more difficult and the complete piece will be bulky.

Attach the snap stud to the larger leather piece that way when you glue it the back is protected, and the snap does not have to fit through two layers of leather.

Match up the pieces and trace the outline of the larger piece onto the smaller one, this will show you where to put the glue.

Rough up the surface of the leather between the two guidelines so that it will take the glue more easily and create a tighter seal.

4. Glue and stitch the pieces together

Apply glue to the roughed area of the smaller piece and place the large one on it. Using a mallet, tap the pieces together to get a nice seal and then clip the edges together until the glue dries.

Using the groover, create a stitch line on the front piece of the card case interior. Line up the chisel along the groove, and gently tap it to make a light impression in the leather. Take up the chisel and move it forward placing the last two prongs in the last two impressions. Tap down lightly again to continue the line of stitch holes. Repeat this until you have made as many holes as you desire. Move the leather to an anvil, line up the chisel in the existing holes and punch them through with a mallet or hammer. Don’t be shy with this part, it can take some force to get the holes made.

Using the waxed thread and a straight needle stitch through the holes to make a simple decorative yet functional detail. Secure loose threads at the back of the work by knotting them and using a flame to slightly melt the wax.

Place the soon-to-be case smooth side down and fold it over to see how it fits together. Mark the place where the top of the interior front piece meets the top of the back interior, so you know where to stop the glue. At this point I had to cut down the top piece to make it fit, but it worked out fine. Apply glue along the sides, press them together, and secure the pieces with a weight or clips.

Create the side stitching just as you did with the front piece.

Attach the cap part of the snap to the flap making sure that the cap and socket lines up with the stud.

5. Finish the Work

Now that you have finished the assembly, you are ready to put the finishing touches. This is your last chance to make any cuts to the piece so that it is symmetric. After trimming inspect the card case to see where their edges may not match up or where there is glue that has seeped out and dried. Take care of both with sandpaper.

Once you are satisfied with the sanding, run a bevel knife around the edges of the leather to remove the sharp edges. You can also create rounded edges with an edge shaver (the callous knife) or even with an Xacto knife. Now you are ready to burnish the edges to create a smooth polished look. Apply wax to the edges and rub them vigorously with a burnishing tool or any other hard smooth wood, plastic, or glass object that is sturdy and easy to hold in one hand. Eventually the edges will become smooth, and the leather will appear darker.

6. Enjoy and Reflect

Your card case is ready to use. Go ahead and slip some cards into it and enjoy. Over time the leather will become softer, and the edges will naturally continue the burnishing process with use. You still have enough leather to make a second piece. Why wait? After making my piece I thought about all the things I could do differently on the second one but the most important lesson I learned was that I improved my admittedly basic leathercraft skills with each cut. Creating the card case was fun and took just a few hours. Now that I have the basic equipment and some leather remnants, I am inspired to try more projects. I see an envelope clutch in my near future and have visions of everyone I know getting wild print card cases and change purses for the holidays.


Customers Also Viewed

Left and Right Hand Leatherwork Crafting Knives
Sold out

Half-Moon Leather Knife
Sold out

Sold out

Written by Garrett Wade

Tags:

Latest Posts

A link back to the top of the page.