Japanese Garden Tools Vs. American: What’s the Difference?
You may have seen Japanese gardening tools popping up more in stores and online. Sure, they&rs… Read More

Curved knives for spoon carving can be difficult to store and protect. My friend Michelle sent me a picture of a knife sheath that she hoped to emulate for her carving knives. Although she’s already skilled at sewing fabric, she wanted some tips on how to approach her first leather-crafting project. The sheath that she likes is a simple design that uses one piece of hardware and minimal sewing. Because the best lessons I’ve ever received came from watching others work, I set up my phone on a tripod and got to work, pretending that she was standing there looking over my shoulder. Here’s that process divided into four short videos.
Every leather project that I’ve ever done has started with a paper pattern. It allows me to quickly and cheaply find (or come close to) the right shape and dimensions for my project —as you’ll see here. The pitfall however, is that paper is much thinner than leather and so the materials required for bends and corners vary a lot between the two and you’ll see my miscalculation with this.
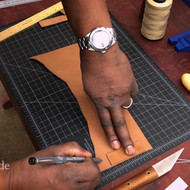
The paper pattern worked on the blade so I transferred it to a piece of scrap leather. I never expect to hit the perfect design on the first try so I keep lots of scrap leather around. In this case, the leather is about 3-4 mm thick. It has good flexibility to make the bends and it’s thick enough to be a tough sheath. The first leather version is the perfect length and width but the tabs are not long enough to overlap as it did on my paper pattern. I quickly redo it and simply eyeball some additional length for the tabs on the second version.
The tabs on the second leather pattern are much better and so I move on to install the closure. For closure hardware, I chose a Sam Browne button, because the ‘tallness’ of the button allows for the thickness of the two overlapping leather flaps. Again, I eyeball the position of the button and the matching holes.
At this point the sheath will hold the knife but it has little side-to-side stability. The two small stiches will hold the sheath in place. I used heavy cord to make a single simple stitch on each side but it is somewhat vulnerable to being cut by the knife inside. Stitching along the entire edge, lengthwise, might be more secure, though more complicated. Or, I could have used copper wire to lace the edge instead. Once completed, I’ll use the prototype for a long time before committing to the design. This allows me to discover small flaws and allows for further refinements.
Conclusion: My mantra for prototyping anything is this: “Keep going, it’ll be okay.” Whatever you’re trying to make, don’t get stuck on small mistakes or the need for perfection. I find that the only way for me to make the perfect thing is to figure out all the wrong ways to do it. I simply cannot avoid making mistakes along the way, so I try to welcome them as they happen. Good luck with your project.