
Japanese Garden Tools Vs. American: What’s the Difference?
You may have seen Japanese gardening tools popping up more in stores and online. Sure, they’re… Read More


Think back to when you were a kid. What is your earliest memory of making things? Nearly every craftsperson I have asked this question has looked back with fondness on memories of getting to help their parents with projects around the house, or the privilege of using a new tool. There is a certain kind of magic that happens when you pick up a new (and slightly scary) tool and use it for the first time. After 6 years of teaching woodworking to young people, I have had the joy of witnessing these milestone moments hundreds of times over. The trust and responsibility of using a tool safely and effectively is so empowering for a young person and can have effects that last a lifetime.
This article explains how to get your kids involved in your woodworking projects in a positive way. I will be borrowing my good friend’s 5-year-old son, Calvin, to help me put together a log cabin bird feeder. Calvin loves birds and is very excited to make something he can take home. We are making a log cabin style bird feeder because they are fun and easy to assemble. I am going to prepare the logs and the base ahead of time in order to maximize the fun of the experience. He will be helping with some of the most exciting parts of the project (assembling and finishing) but won’t be involved in any of the more dangerous aspects (splitting the “logs,” sawing, or chisel work). I have chosen a 5-year-old for my helper in order to showcase some universal and safe ways to get any kid involved. I will also detail how to scale up the project for older kids and some useful teaching tips at the end of the article.
An important thing to consider is the concept of perceived risk vs actual risk. Perceived risk is healthy and leads to respect for the tools and process. Actual risk should be minimized at all cost. A good rule of thumb is if you are uncomfortable with what is happening, it is likely not safe. Everything we are doing in this article is very low risk (we might spill some glue or paint, but I’m OK with that). If you are scaling up the involvement for older kids, be sure to set good safety parameters and explain the risks ahead of time. Because young people have less experience with hand-eye coordination and situational awareness, it is important to go slow and practice using tools before getting lost in the process. Treating all tools as two-handed tools to start is a great way to ensure that their hands aren’t in the path of the tool. No matter what tools a young person is using, I like to set up a Freeze word, like HOLD! When you say it, they freeze whatever they’re doing so you can correct something dangerous like bad form or a tool about to fall on the ground. Try to only use this in urgent situations and be sure to practice a few times before beginning.
1. Measure and Cut Out the Base, Gables and Inner Supports
Measure the base and cut out with a saw. For the gables, begin with a 6” base. Using the 60-degree edge of the triangle template, trace the top two sides of the triangles. Repeat for second gable and cut out with the saw. Cut the gable supports and ridge pole to length.

2. Split 1” Square Pieces for Cabin Logs (or buy dowels)
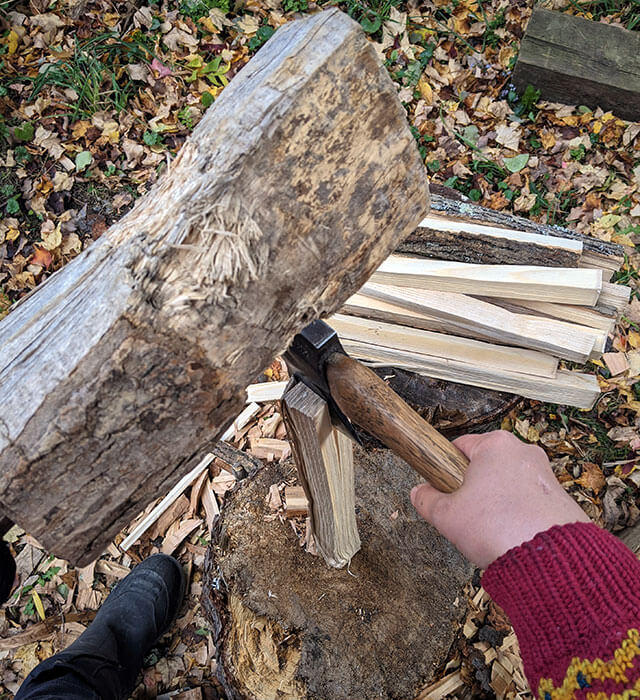
With a hatchet and a wooden mallet, split the wood into 1” square pieces. I used ash wood from my firewood pile because it’s about 13” long (each will make 2 cabin logs), has very straight grain, and splits easily. If you don’t have access to ash, fear not! ¾” dowels from the hardware store work great. If using dowels, go to Step 4.
3. Round the Cabin Logs and Saw to Length
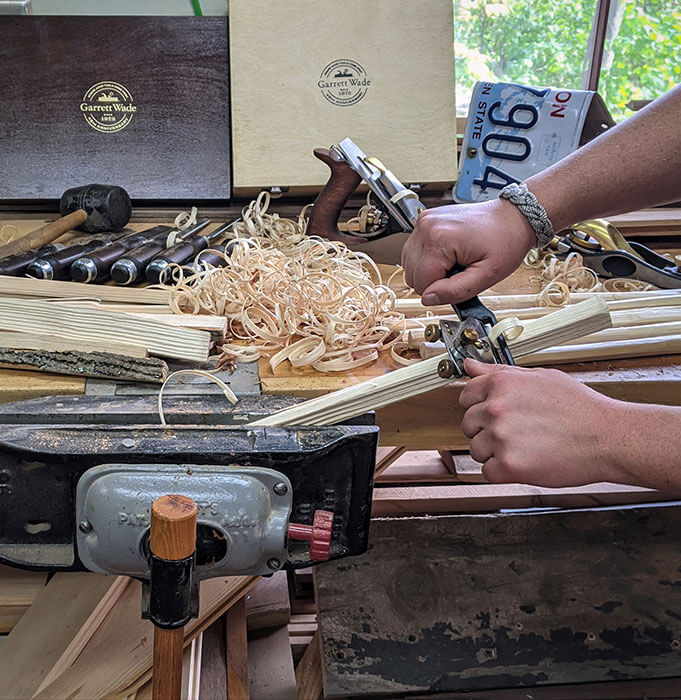
With the square piece of wood in a vise or a clamp, use the spokeshave to round the edges. Try to be consistent with each pass and check the cross section of the piece of wood to see your progress. You will need to rotate the piece of wood several times to achieve the desired results. The logs don’t need to be perfectly circular, but they should be as uniform as possible, so use a rasp to finish shaping each piece. Once all the pieces of wood have been rounded, measure 6” lengths on each and cut to length
4. Draw on Chisel Lines and Saw the Joint Edges
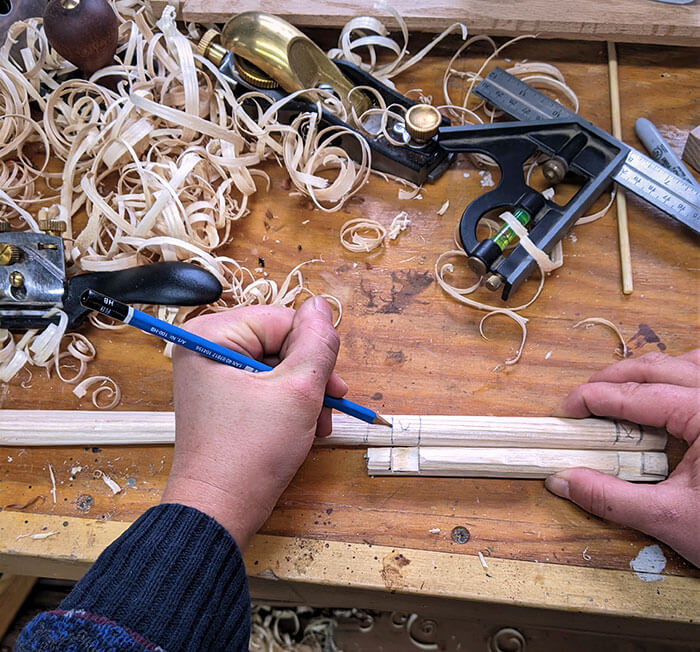
On the end of your first “log,” draw lines across the log ½” in and 1 ½” in from the edge. Then draw an X in between the two lines. Repeat on the other end. Tip: make a “template log” by measuring and carefully drawing lines, then simply line up each log with your template log and transfer the lines by drawing straight across.
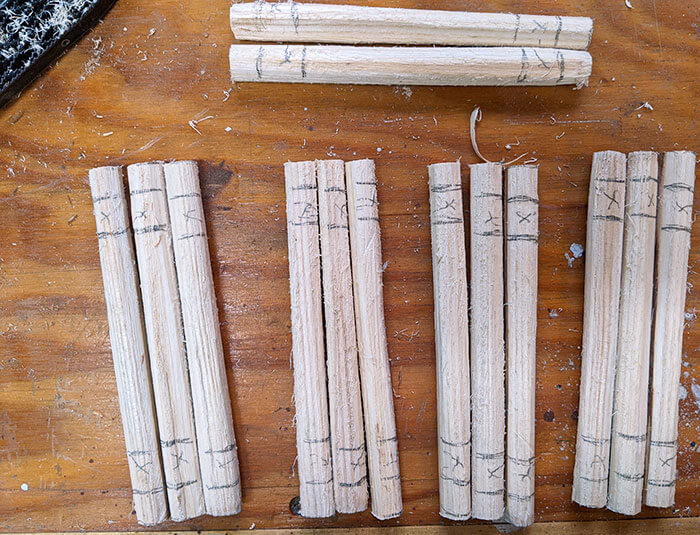
Once all lines have been drawn, set your first log upright in your vice, and saw perpendicular to the log along each line until you are about 1/8” from the center. Repeat on other side, then flip around and saw the lines on the other end. Each log will have 8 saw cuts and a ¼” section between each pair of saw cuts. Four of your logs will only have the joints on one side (the top and bottom logs) so you won’t have gaps in your log cabin. Feel free to do this step on the bandsaw to save you some time. It gets very repetitive.
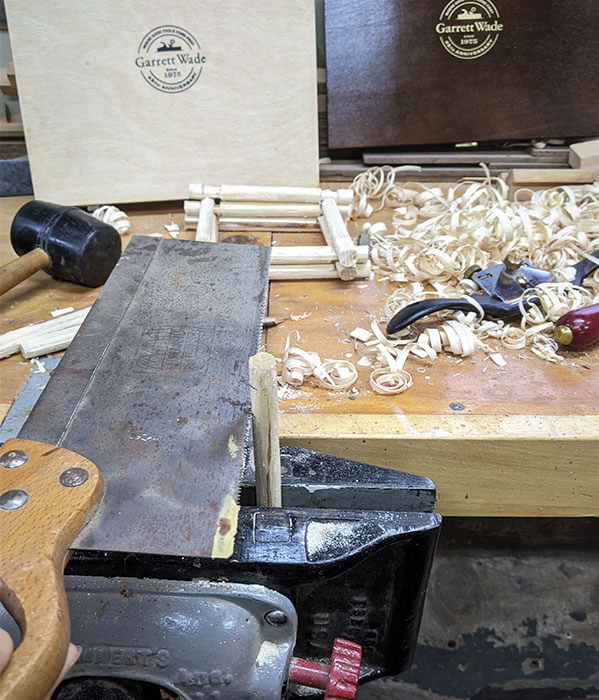
5. Chisel Log Junctions (Your Job) and Sand the Logs*
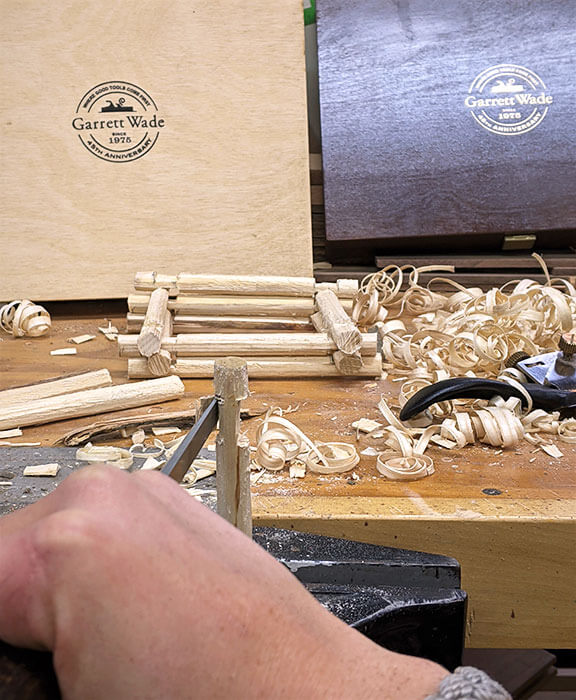
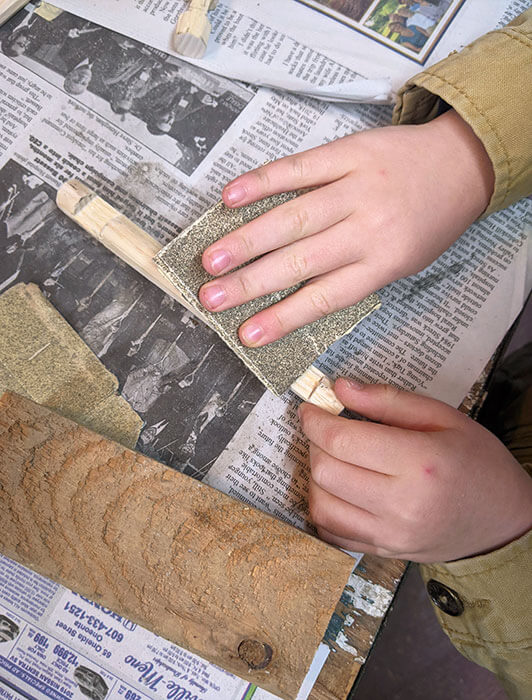
With your first log in the vise, align your ½” chisel perpendicular to the log between the first two saw cuts. Gently tap the chisel with the soft mallet until you have mortised out the joint on the first side of the log. Repeat on the other side, then flip the log in the vise and chisel out the joints on the other end. Test that the logs fit together before handing them over to your helper. If the joints are too tight, saw them wider. If there are big gaps between logs, chisel more towards the center line. After making about ten logs, I had Calvin begin sanding them while I finished the rest. To make the doors on the two sides, I picked two logs and sawed an inch out of the middle of each. These will go on top of the two base logs.
6. Assemble and Glue Logs*
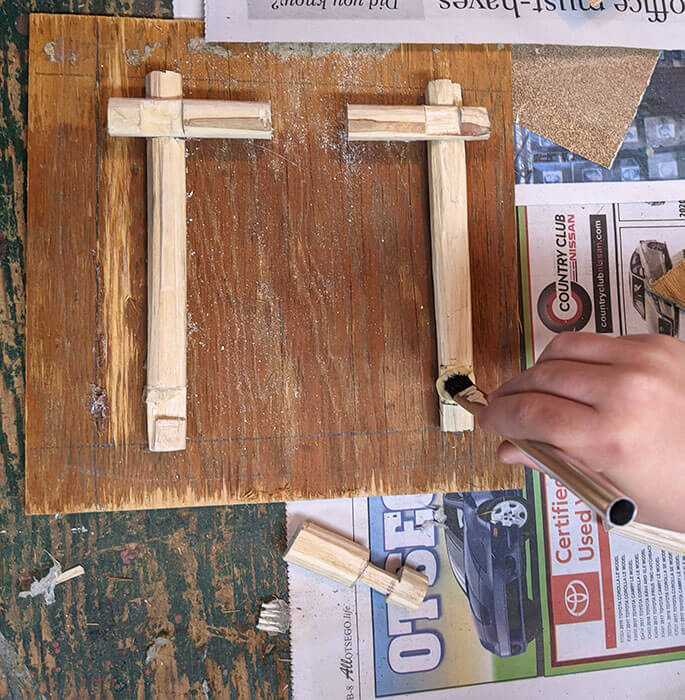
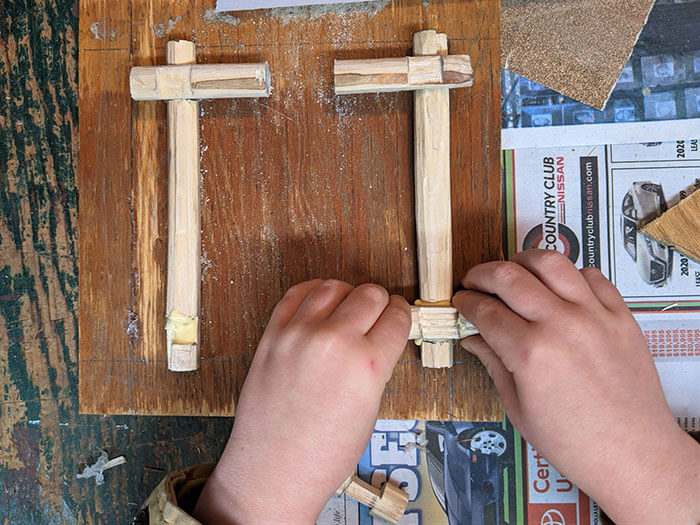
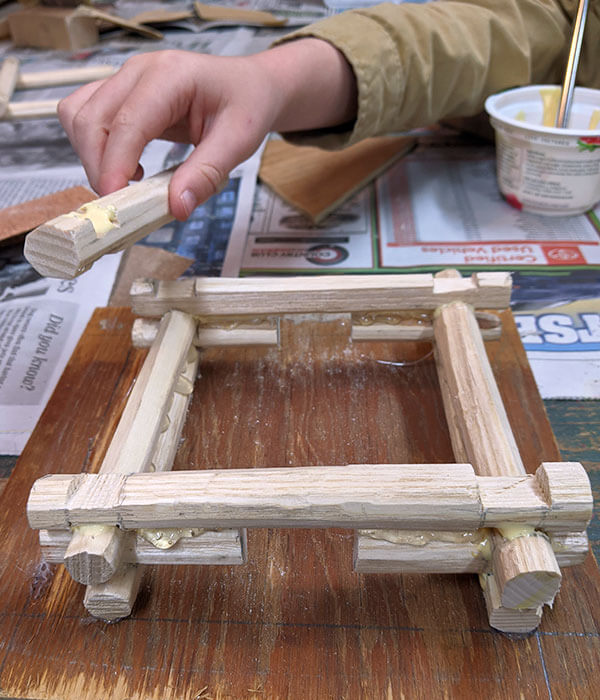
This is one of the most exciting steps for your young helper, because they get to put together the log cabin. I double checked with Calvin’s mom that he had used glue before. First, I set him to the task of assembling the pieces without glue so that he would have a good idea of what it would look like. Once he solved the puzzle, I set him up with a small container of wood glue and a glue brush. On Calvin’s bird feeder, we used a line of Low-temp hot glue instead of clamps to hold the logs stable until the wood glue in the joints dried. I had Calvin paint glue into both joints and press down on each new log until the hot glue had set. We were very careful not to touch the hot glue. Overall, you will have 2 sides that are 3 logs tall, and 2 sides that are 4 logs tall (the gable ends).
7. Assemble Gable Sections and Supports
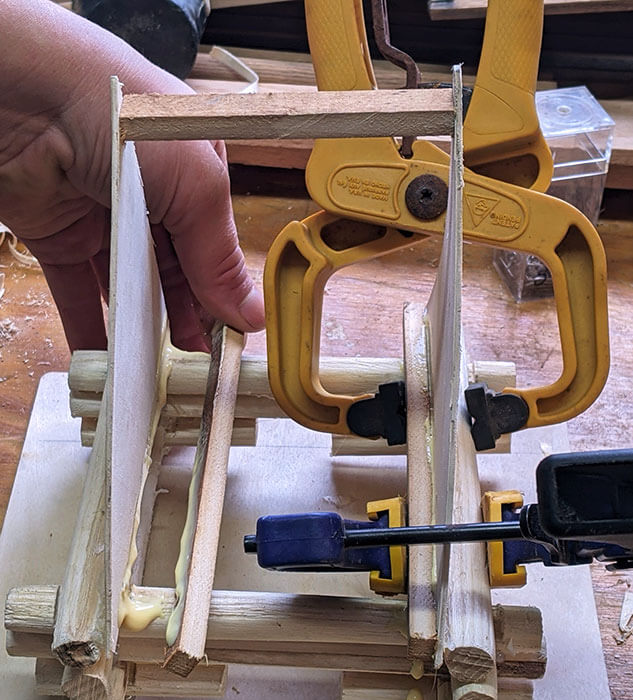
Gather your two inner gable supports and ridge pole. Add a line of wood glue to the bottom of the first gable and set behind the top log. Add a line of wood glue to the inner support and two dots of glue to the top of the side logs. Line up the support behind the bottom of the gable and clamp. Repeat with the other gable. Glue the ridge pole to the gable peaks and stabilize with a finishing nail on each end. Leave to cure overnight.
8. Construct Roof*
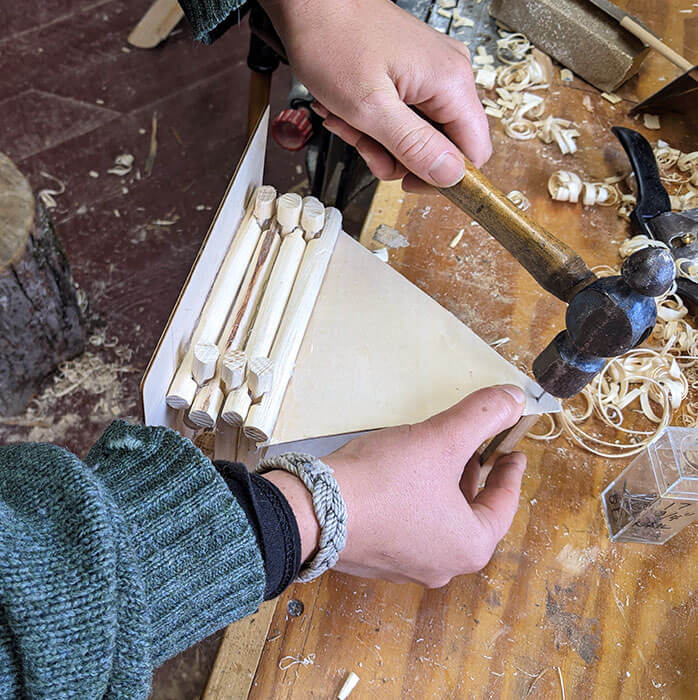
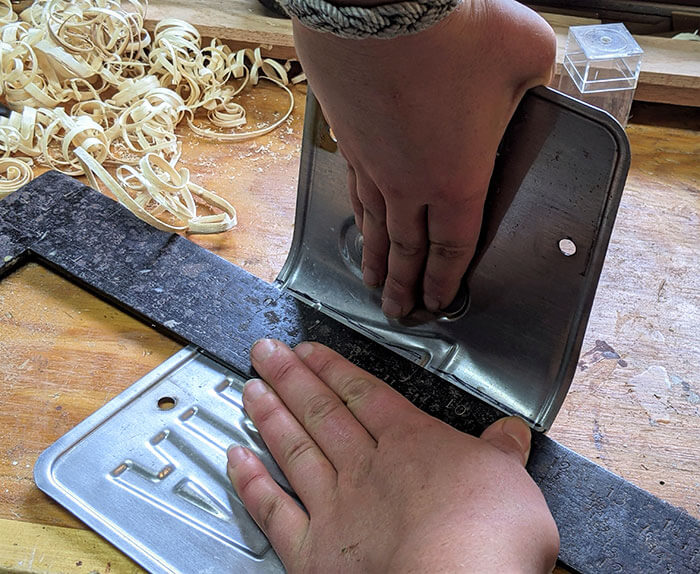
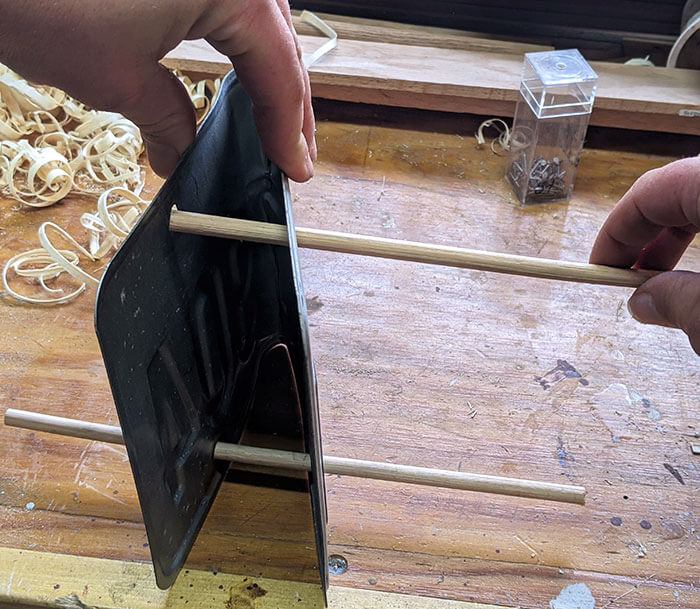
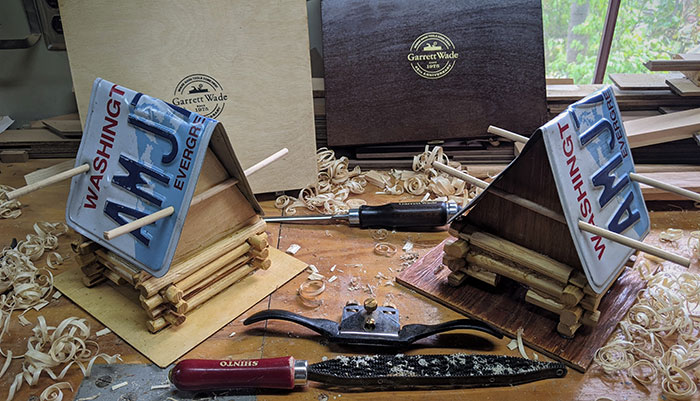
The roof will be detachable so you can refill the feeder with bird seed. The roof dowels have two functions: holding on the roof and providing perches for visiting birds. Fold the license plate along a center line and line up the holes on each side. Tip: fold against a sturdy straight surface and carefully tap with the mallet. Insert the bamboo dowel into the holes until it is centered. Repeat with second dowel. Carefully open the halves of the license plate until the roof is at a 60-degree angle and fits snugly on your bird feeder (You should have some resistance from the license plate keeping the dowels in place). The dowels will rest snugly on the outside of each gable and protrude from the roof for a few inches on each side to provide nice perches. If you are worried about the roof blowing off, feel free to add a latch to the gable that hooks onto the dowels. Calvin helped by telling me when the roof looked perfect.

9. Finish*
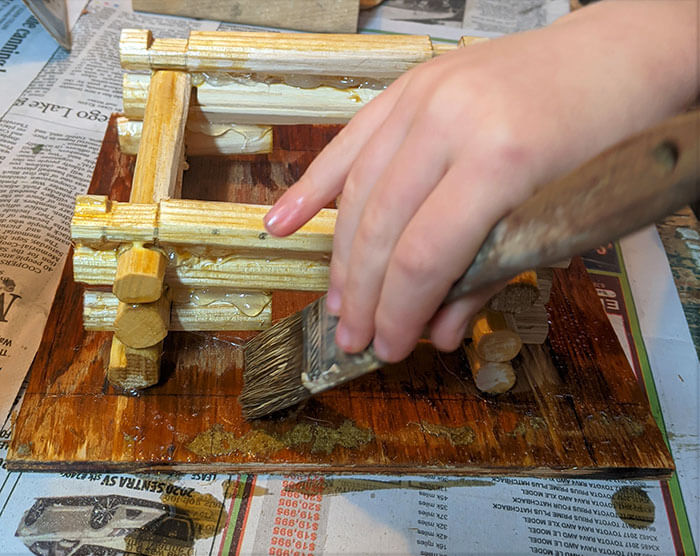
First, set down plenty of newspaper on your work surface. After instructing your helper on how to use the brush and varnish, have them coat the outside of the logs, the gables, and the base in an even layer of varnish. Once they have finished, touch-up and missed spots (as secretly as necessary) and allow to dry overnight. If you don’t want to use varnish, you are welcome to use non-toxic paint instead. If using varnish, disposable gloves are a great way to keep your helper’s hands clean. I refilled the brush for Calvin, and he did a great job of neatly applying the varnish, so he didn’t need gloves. Pictured is Calvin varnishing the bottom half of his log cabin (in the interest of time/attention spans, we needed to skip ahead in the steps). We assembled the gables and roof later.
Once your bird feeder is dry, it’s time to fill it with birdseed and offer it up to your feathered friends! If you would like to hang your feeder, I recommend attaching hooks to the corners of the base. I asked Calvin about how he enjoyed his first woodworking experience and he said, “It is awesome! I’m going to put it outside to feed the birds and chickens!” Lucky chickens. He also somehow came away from this experience thinking that he had taught me how to build a bird feeder, so I’d call it a success overall.
If you have older kids, you can involve them in some more aspects of this project. I’ve outlined some by age group below. These are all generalized observations from my 6 years of teaching and is by no means a definitive summary of developmental phases. You know your kid and their abilities better than anyone, so feel free to modify and branch out from these suggestions.
5 and 6-year-olds have a wide range of abilities and attention spans. They can be the toughest age group to work with, but also the most rewarding. They are notorious for losing focus shortly into a project, but if you stick with it (try 20 minutes at a time until the project is finished) they will be super proud of their accomplishments. Sanding, gluing and painting are very accessible and easy to touch-up later. These tasks also span the entire project, and no one will judge you if you “spin the story” and let them feel like they made the whole thing. But beware, you may have a devoted woodworker very quickly. Or they’ll hate it, and that’s fine too.
7 to 9 years old is a great time to get them involved with the math and the 3-dimensional aspects of the project. If they enjoy math and want to help you draw out your measurements, teach them how to use the measuring tools. Just be sure to check the measurements before proceeding (the truest form of “measure twice, cut once”). Older kids in this age group will have decent success with the spokeshave as well as rasps and files for more rough shaping. They will also love to practice certain tasks, like hammering nails into wood and using the spokeshave on a scrap piece. It is very important to explain tool safety clearly up front and check for understanding before they begin.
Helpers age 10 and up can be successful with all the steps except splitting the “logs.” I have certainly had some students in this age group that have used a hatchet safely, but I generally reserve that tool for teenagers and adults. If your kid is very independent, you can each make a bird feeder, so that you can model the steps and silently help. If they would rather make one with you, that’s fine too! If you feel that your teen is ready for hatchets and power tools, be sure to teach them the proper safety precautions and always supervise with hawk-like focus.
When first getting your kids involved in woodworking projects, it helps to litter the experience with “wins” and to not expect commitment or follow through from them. We know that every project takes twice as long to finish as we expect, but they don’t need to learn that lesson quite yet. In order to set you both up for success, find a project that you actually want to make, and that they can help with in any capacity. I chose a bird feeder because I need a bird feeder, and Calvin loves birds. Even though you’re keeping the commitment low, try not to limit their involvement either. If they sand a couple logs, great! If they want to hang out and watch as your saw endless joints in logs, awesome! As your kids get more experienced and their interest grows, you can increase your accountability standards for them. No one wants a shop full of half-finished projects.
I’ve found in my time teaching that attention spans grow as kids become invested in something. They are also much more likely to be interested in authentic experiences. That is why we are making a real bird feeder with real tools and materials. Whatever way Calvin chooses to arrange the logs is how we will inevitably glue them. In the beginning of their woodworking journey, start with tasks that take 5 to 10 minutes to complete. I like to provide a very short demo (a minute or two on how to use the tool to do the step) then I step back. I supervise for safety and jump in if they get too frustrated. Letting them work things out on their own is a great way to build confidence and encourage ownership over a project. Frontloading a tedious step with importance and perhaps a little intrigue can spice it up. For instance, sanding is very boring after a few minutes. They’ll be much more likely to stick to it if you explain why it’s so important and provide rewards (for instance, they get to choose the paint color for any walls they sand. You get to choose the paint color for any walls they don’t sand).
Making sure your helper is doing a task safely and correctly is very important. However, it can be intimidating for them if they feel like you’re watching too intensely, expecting perfection, so try to appear busy with other things. If your kid needs some extra help, feel free to do the step with them, working on your own part of it to keep modelling the step. That way if they get lost, they can look over at yours for a reminder.
Make it Fun! Feel free to incorporate some fun and games into your time together. I regularly host wood curl beauty contests and spend time celebrating their successes. Many young woodworkers’ lifelong journeys have begun with the perfect wood curl off a hand plane. Good luck and have fun!