null Skip to Content
How To Install Snap Fasteners

How To Install Snap Fasteners

How To Install Snap Fasteners

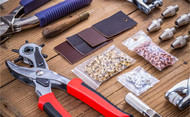
Snap fasteners are a fixture of countless accessories and clothing items—from cowboy shirts to tool rolls, handbags to raincoats—allowing effortless one-handed opening and closing and a reliable hold. They’re also easy to add pretty much anywhere, provided you’ve got a couple simple tools. Whether you’re repairing an old leather jacket or making a tool tote from scratch, here’s an easy guide to installing fasteners on your projects using our Snap Setter & Snap Kit.

Sold out

Sold out

Step 1: Mark Your Snap Layout

Mark Your Snap Layout Whether you need a single snap or a long series, figure out where you need them and lay out your puncture points clearly with a pencil or marker. This is the most important part of the job—the old adage “measure twice, cut once” holds here. Take your time to ensure even placement, both between buttons and from the edge of your piece. These holes will be the center point of each snap. Once you’re satisfied with your layout, it’s time to punch your holes.

Step 2: Punch a Hole for Each Snap

Now it’s time to make a hole on each mark—this is where all that careful and accurate measurement from Step 1 comes in handy. It’s also an ideal time to use our Revolving Leather Hole Punch, which can punch holes in six sizes (ranging from 1/16” to 3/16”) through even the toughest fabric or leather. Consult your snaps for the appropriate hole size for the job and make a hole on each mark. Take your time!

Step 3: Install Your Snaps, Part 1

Place the Setting Jig from our Snap Setter Kit on your work table and secure it with a clamp; place the seat (a round metal base) in the jig’s bottom hole, ensuring that you use the right seat. For the male end of the snap, this is the seat with a smooth, concave center. (If it has a small rise in the center, set that one aside for the next step.)

Insert the post end of snap through your material, turn over, and rest the snap in the seat so that the post is pointing up. Place an eyelet on the post. Your material should now be sandwiched between the button and eyelet.

Now take the seating tool and place it through the jig’s top hole and onto your assembled post and eyelet, centering it on the eyelet. Using a sold mallet or hammer, firmly tap the seating tool to set your snap. It should only take a couple of firm strikes. Check your work—if the rivet looks flat and secure, proceed with the rest of the male snaps.

Step 4: Install Your Snaps, Part 2

No surprises here—simply repeat the above procedure with the female halves of your snaps, making sure to use the seat with the raised center. Set each snap in place with a few firm mallet taps and your work is done. Time to figure out your next project!

Revised from: https://garrettwade.com/blog/how-to-install-snap-buttons/

Written by Garrett Wade

Latest Posts

A link back to the top of the page.