


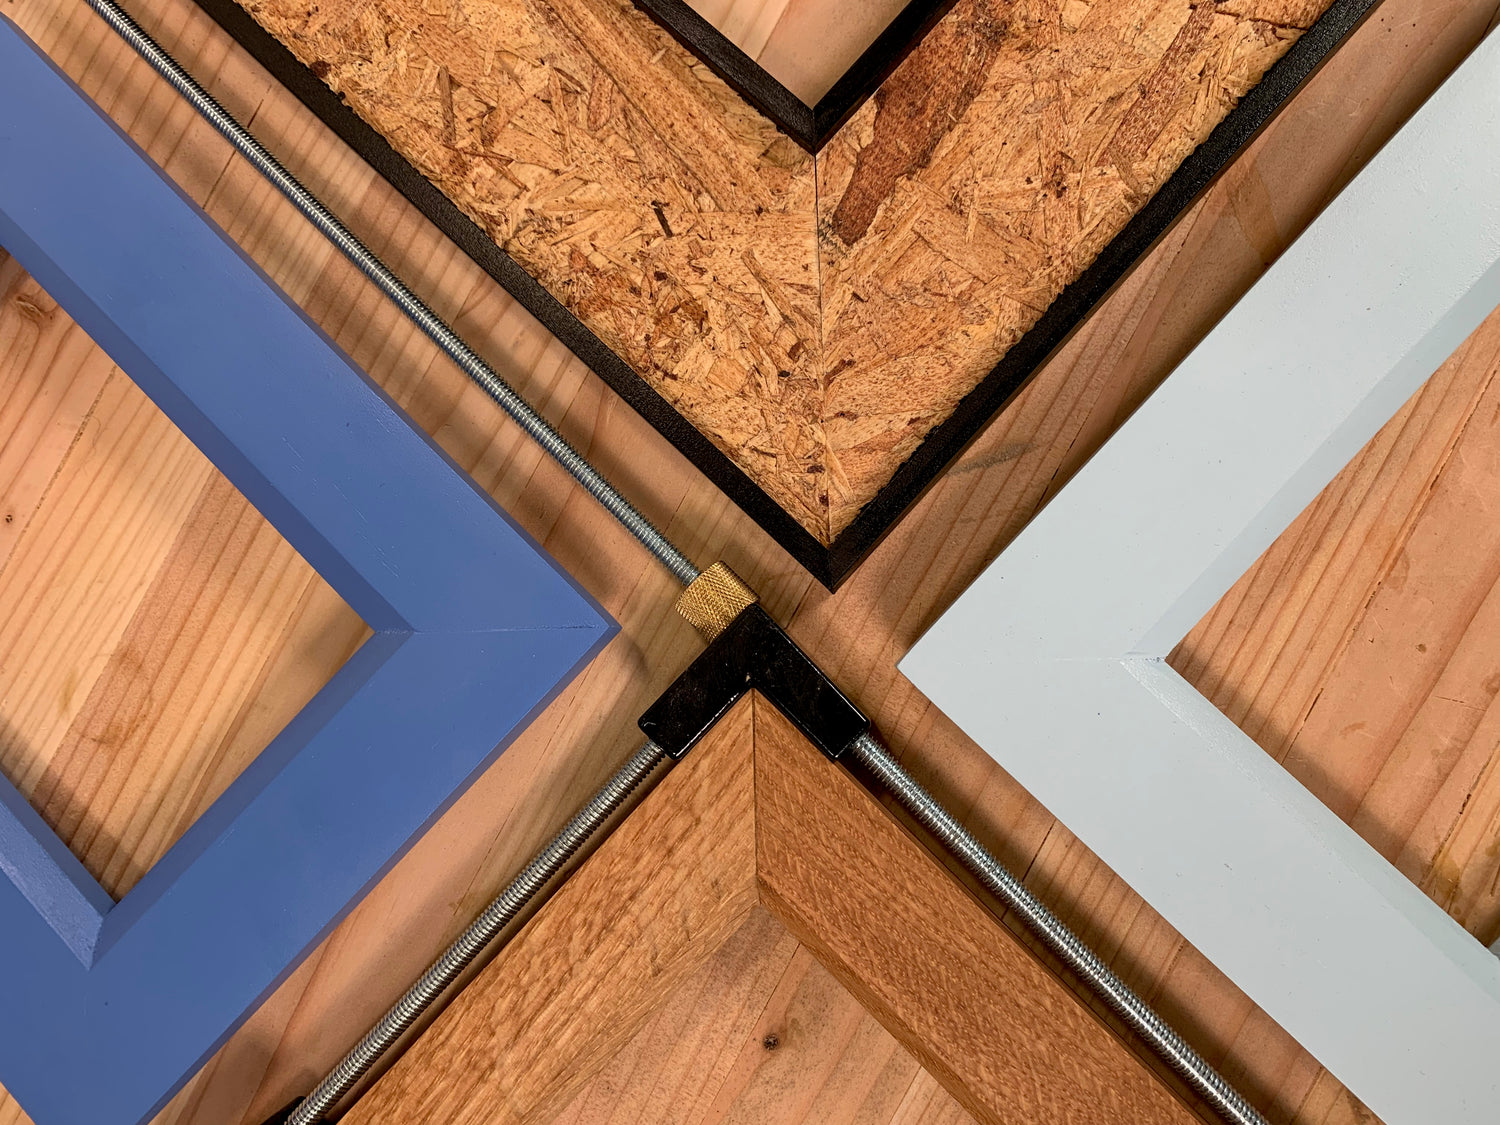
Picture frames make great gifts and woodworkers of all skill levels can make one, even beginners. One of the harder parts of creating a frame is making the rabbets, the space that will hold the picture and glass in place. This is hard if you are just starting out or don't have the proper tools. However, Kelsey has a neat trick to bypass this altogether while still creating the proper space required to hold the picture in place. You will also learn to make your own mitre box, which will come in handy while you make those more complicated cuts.
Picture frames make great gifts and woodworkers of all skill levels can make one, even beginners. One of the harder parts of creating a frame is making the rabbets, the space that will hold the picture and glass in place. This is hard if you are just starting out or don't have the proper tools. However, Kelsey has a neat trick to bypass this altogether while still creating the proper space required to hold the picture in place. You will also learn to make your own mitre box, which will come in handy while you make those more complicated cuts.
Materials required:
- Pencil
- Odd Job or marking gauge
- Block plane
- Dovetail saw (or any saw with a spine to provide depth stop. See Garrett Wade selection of handsaws)
- Mitre box (you can also make your own. See Step 5 below)
- Glue
- Frame clamps
- Your favorite finishes or stains
Time to Complete: 2 hours
Step 1: Prepare Materials
Prepare the rail or side material for your picture frame by rip cutting your wood to the desired width. The width of the sides of your frame is an entirely aesthetic decision, so you can cut your material to whatever dimension you think will look good. You can even use a pre-cut dimension to save you a step. Half inch thick material is the ideal thickness for this project, but anything from 3/8 to 3/4" should work fine.
Step 2: Form the Rabbets (?)
Probably the most difficult part of making frames for a beginner woodworking or someone with limited tools is cutting the rabbet that holds the art and glass. This design bypasses that step completely. All you have to do now is mark a line on what will be the inside, back edge of the frame. It does not have to be precise, but somewhere around 3/16-1/4" is ideal. You can do this with a wheel marking gauge or the Odd-Job.
Step 3: Add Chamfer
It is much easier to add a design or detail to your frame while the rail material is still in a single long piece. I like to add a chamfer on what will be the front, inside edge of the frame, opposite of the line made in Step 2. This is easily done with a block plane.
Step 4: Lay Out Sides of Frame
Now it’s time to lay out the sides of our frame. Start with a 45 degree line on the back of the material that goes in from the outside edge to the inside edge where our line is. Since our art and glass will sit within the space created by that line, we need to measure our dimensions on the line, not on the inside or outside edge. For a standard 4x6" frame, measure 4-1/8"from the point where the 45 degree angle meets our line and make a mark. The extra 1/8" will give us 1/16" of play on each side to fit our glass easily. Now strike another 45 degree line on the mark going in the opposite direction as the first 45 degree line.
Repeat the same process for the long sides.
Step 5: Neat Trick - Make a Mitre Box
You could try to make the 45 degree cuts free hand, but it will be very difficult to do accurately. I recommend making a quick miter box to make accurate and repeatable cuts, especially if you plan on making more than one frame. All you need is a piece of wood to be the base and two pieces that are as wide as the width of your saw blade plus the thickness of your base material. These two pieces are simply glued to the edges of the base creating a U shaped channel. You can add screws or nails for extra strength. Then carefully cut 90 degree and a 45 degree slots with your handsaw across the width of the miter box. Cut deep enough for the saw to just cut into the base. A saw with a spine like a dovetail saw will have its own convenient depth stop.
Step 6: Make Angled Cuts
With the miter box it is now easy to cut to your lines on the rail material. Another great trick is to double stack your rail material to cut out the corresponding sides at the same time, ensuring they are exactly the same length.
Step 7: Glue Frame
Once you have the 4 sides cut out, it’s time to glue up the frame. Test fit all the pieces to make sure the frame is square. You can use sand paper glued to a flat piece of wood to help clean up the cuts and ensure that they are flat. Apply a little bit of wood glue to each mitered edge and put them all together. You could get away with using masking tape to clamp the corners together, but a frame clamp makes it much easier to keep everything square and ensure a strong joint. Clean up the excess glue and rub saw dust from the miter box on the joint while the glue is still wet to help fill any gaps in the joint.
Step 8: Create Rabbets
After the glue dries, it is time to make the rabbet to hold our picture. Simple take strips of 1/4" wood cut to about an inch width and use it to frame along that line we made on the back of the frame in Step 2. Use your miter box to make clean 90 degree cuts, add glue to the back of each piece, and hold them in place with spring camps. These pieces will overlap your miters, adding a bit of strength. For even more strength you can add short nails, or use what is called a V-nail across the miters themself. If you use V nails, you can glue the backing strip on before you cut out the sides of your frame.
Step 9: Customize with Finishes or Stains
Now that your frame is put together, you can add more customization. You may need to do a bit of sanding to clean up the frame, then you can add stain, paint, or different finishes. You can also try painting or carving unique designs into the frame. You can also add hardware for hanging the frame or drill a hole for a piece of dowel to serve as a simple stand.
Step 10: Add Your Art!
Finally, you can add glass and your art. It is easy to cut clear acrylic to fit any size frame. Simply score a line with a sharp knife and ruler and the acrylic will snap on that line. You can also buy replacement glass in standard sizes or steal from a cheap frame. Make sure to clean the glass on both sizes before putting it in the frame followed by the art and a piece of cardboard as a backer. To hold everything in, we can use what are called glazer points. Carefully drive one into each side of the rabbet with the tip of a screwdriver and a mallet. Once the art is secured, it is good to add some masking tape along the back seam to prevent dust from getting in.
Now your frame is done! You can use this same process to make an infinite amount of different designs by playing around with materials, shapes, and colors. A custom frame with a special photograph or peice of art makes a great, unique gift for anyone in your life.
Now your frame is done! You can use this same process to make an infinite amount of different designs by playing around with materials, shapes, and colors. A custom frame with a special photograph or peice of art makes a great, unique gift for anyone in your life.

