


Introduction:
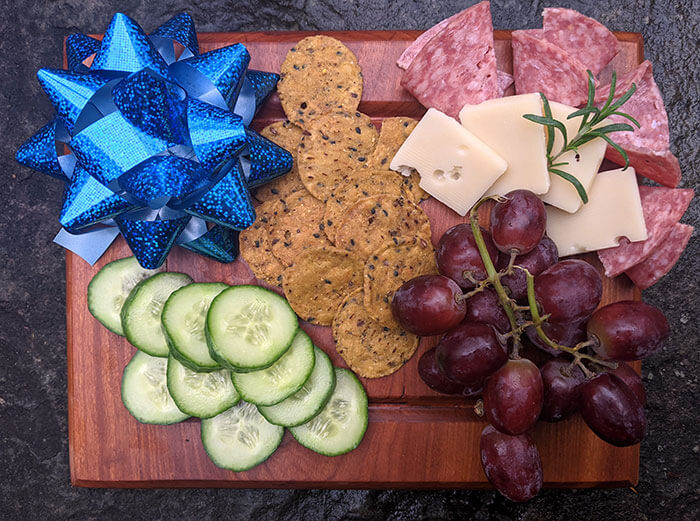
Charcuterie is a French term for the process of curing meats. Charcuterie boards (for serving said meats) have exploded in popularity over the past few years. In its most simple form, a charcuterie board is a block of wood that you can pile on meats, cheeses, grapes, olives and whatever else you choose in an artful appetizer display. Also called Grazing Boards, they have been popular offerings at many restaurant and dinner parties. In 2020, these boards have become a delightful way of spicing up your work-from-home lunch or snacks. I personally have taken to preparing a charcuterie board to set on my workbench and graze on as I work on projects. Even if you can’t imagine the next time you will be hosting guests, you can still make this project and enjoy it with your household. This article explains how to make your own single-serve charcuterie board. You can use the template and steps provided to make a simple board or add any other elements that you wish. I have chosen to add a v-shaped channel for a very important reason: grapes and olives. If you have ever prepared a charcuterie board with these tasty orbs, then you know that the space between your kitchen and your living room becomes a gauntlet of focus and balance. The channel in this board is designed to stop round food from rolling off the edges so you can spend less time looking for olives on the floor of your hallway and more time eating too many types of cheese. These boards also make wonderful gifts. So, whether this project is a gift for someone or for yourself, I hope you enjoy making it!
Tools:
- Corner square with measurements
- Pencil for drawing on wood
- Saw
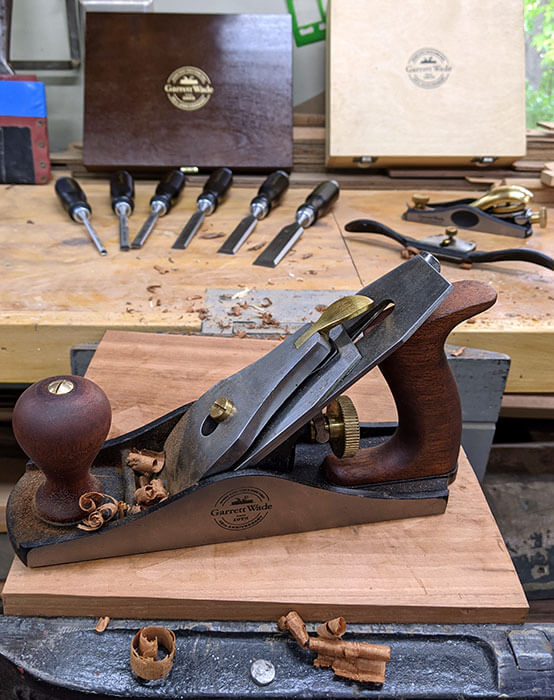
- Chisels: Garrett Wade 45th Anniversary Chisel Set
- Soft mallet (wood, rubber, rawhide, etc) for your chisels. Avoid using a metal hammer because it will damage your chisels.
- Spokeshave, block plane and smoothing plane Garrett Wade 45th Anniversary Set
- vise or other holding device for your piece
Materials:
Block of cured wood the approximate size you want your board. You can find nice slabs of wood at specialty hardwood stores, or you can get creative with your wood sourcing. I have found plenty of beautiful charcuterie-worthy boards at big home improvement stores and at architectural salvage shops. Select a piece of wood that appeals to you and is free of warping, twisting or any visible cracks or imperfections. You can either choose a simple look with plain wood like maple or challenge yourself with figured wood or burls. Note: if you are working with burl wood it is important to stabilize it and treat it properly for structural and sanitary reasons. The wood from this article is from a beautiful old growth cherry 2 x 10 that my dad’s neighbor was getting rid of. Before you begin, measure your board and cut to the desired length. There are no set rules on proper charcuterie dimensions, but the board should be a comfortable weight once it’s loaded down with cured meats and cheeses, so avoid making a board that is too large. This board measures 7 ½” x 9 ½” and in the end will hold enough snacks for 1 to 2 people. If you want a larger board, I suggest making a 10” x 14” board. I used a radial arm saw to cut the board to length (cross grain cuts).
Steps:
1. Plane All Sides of the Board:
Using the smoothing plane, smooth the top and bottom of the board until it sits on a table without rocking and the top is level and the surface is smooth and even. Since my board was rough milled lumber, I didn’t strive for perfection on this step. NOTE: if you are using a metal vise, always clamp your board so that the surface is well above the metal to ensure the safety of your tool
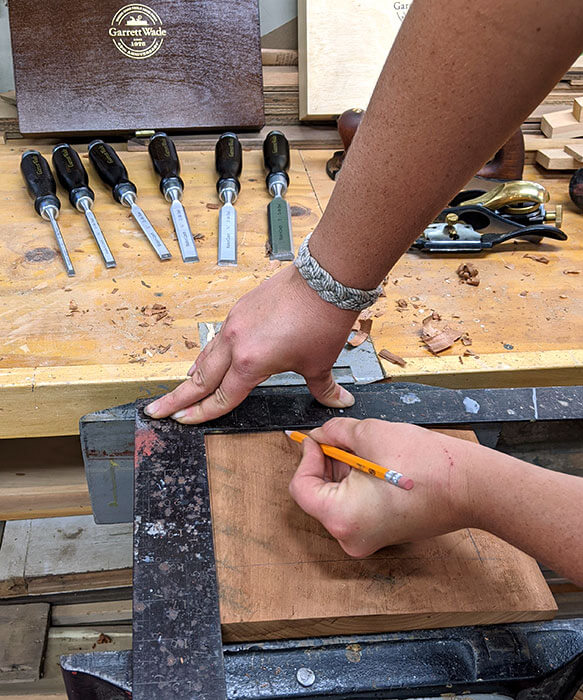
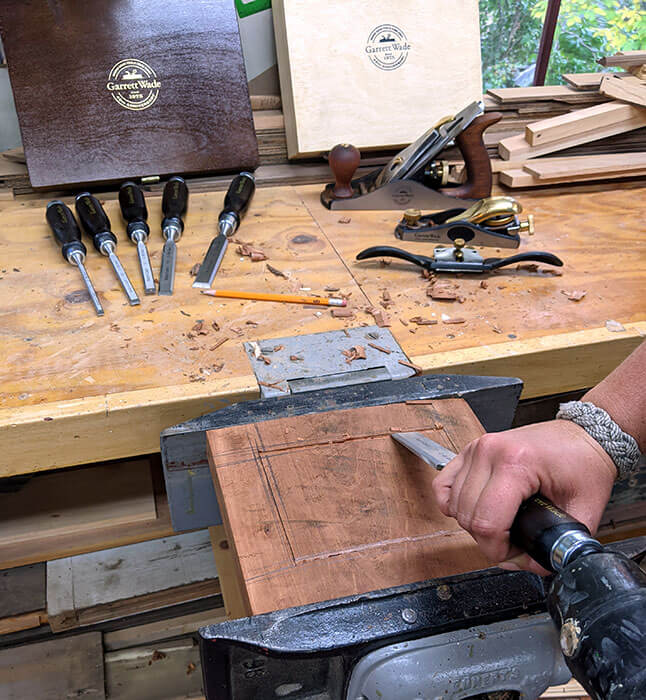
2. Draw V-Shaped Channel and Chisel Center Line:
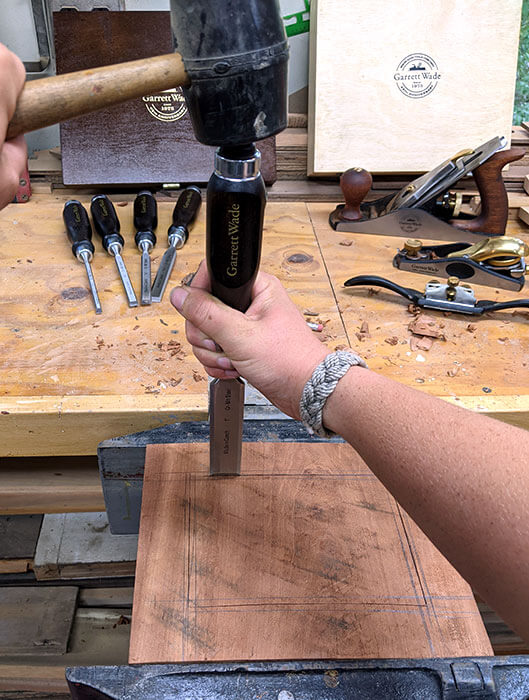
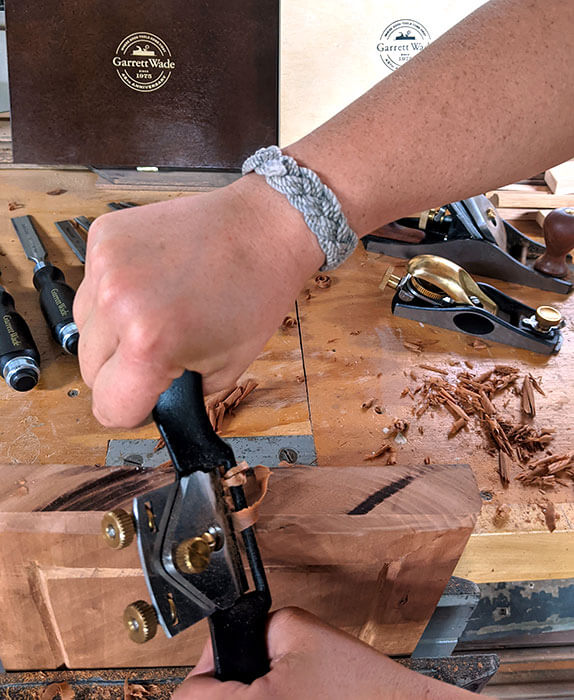
Carving a v-shaped channel around the board will prevent round foods, like grapes and olives, from rolling off the board when it’s finished.Use the pencil to draw the channel center line 2” from the edge around your entire board. Then draw two additional sets of lines ¼” from your center line on either side. The center line will be the low point of the channel and the lines on either side will be the edges. Gently tap the chisel into the board along the center line. Be careful to keep your chisel perpendicular to the surface and try to cut to the same depth each time. I used the 1” chisel for this step.
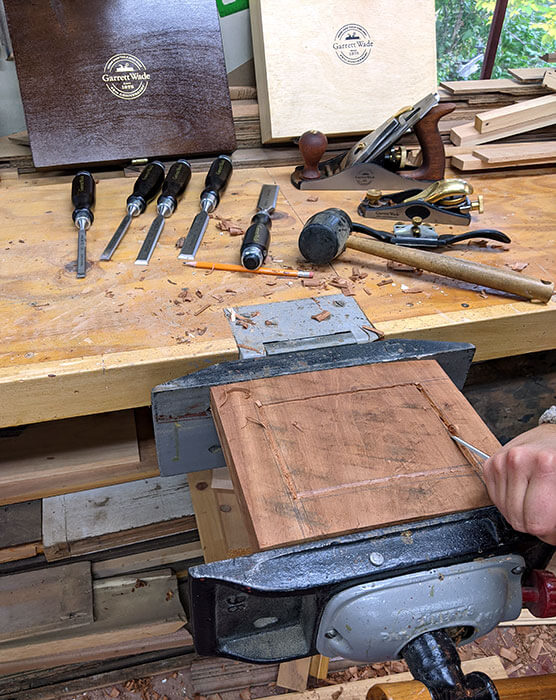
3. Shape the Channel:
For the end-grain sides of the channel: Place the 1” chisel with a shallow angle on the inner trough line, facing the center chisel indent. Gently tap the chisel with the soft mallet until you reach the center line. The wood chip should be released by the center line cut. If it does not release, tap the chisel perpendicular into the center line until it does.
For the channel sides that go with the grain: It is very difficult to accurately cut across the grain with a chisel. Instead, use the ¼” chisel to slowly carve alongside the center line until there is a consistent slope from the outer edge to the center line matching the end-grain side.
Once the inside has all be chiseled out, repeat the process on the outer edge until you have a v-shaped channel around the entire board.
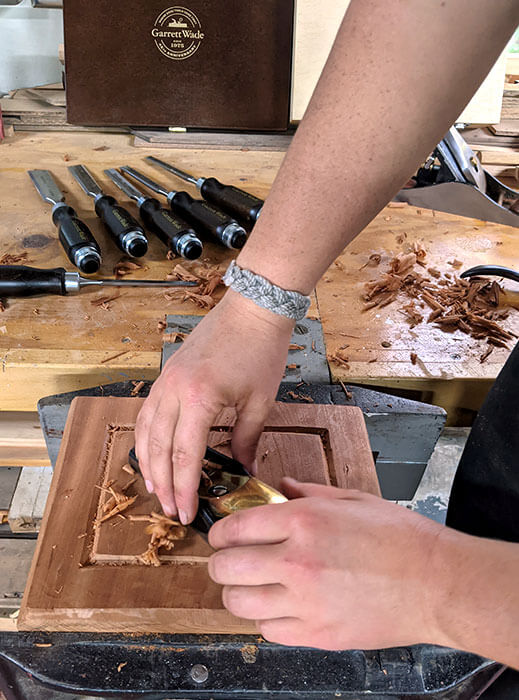
4. Chamfer Edges:
Using the spoke shave, remove all the sharp corners on the outside of the board. This process is called chamfering and will make your board look more finished. You can add small chamfers or, like me, make larger chamfers for a faceted look.
Optional: decorate sides of the board. Adding a decorative border (or some tasteful cheese puns) is a great way to elevate the fanciness (or silliness) of this charcuterie board. Use your creativity here to customize your board. Some good techniques to consider are chip-carving, kohlrosing, or woodburning. Some good cheese names to make into puns: gouda, brie, feta, and cheddar.
5. Finish:
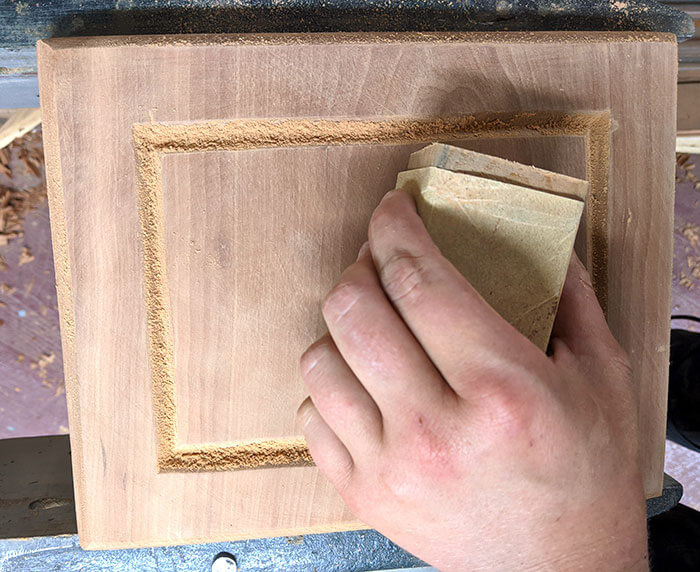
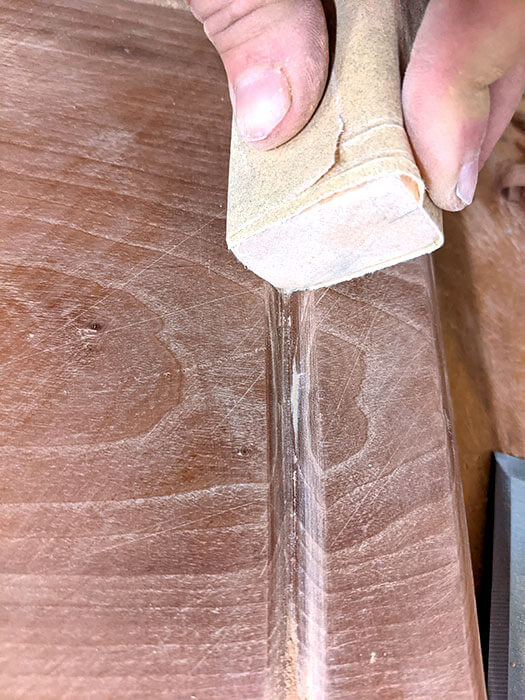
Before sanding, go over the top of your board with the block plane to achieve a nice even surface. Sanding your charcuterie board will remove any tool marks and leave a smooth finish. Start with coarse sandpaper (80 or 100) and a sanding block. Sand the v-shaped channel with the corner of the sanding block. Gradually increase the grit of your sandpaper until you reach the desired smoothness (I like to progress from 80 to 150 to 220 to 400). A general rule of thumb for sandpaper progression is once you have removed the marks of the previous sandpaper, increase the grit. Treating your board with food safe oil will make it waterproof and will accentuate the wood grain.


